Choosing Cameras for 360 Degree Virtual Tours
Discover the best cameras for 360 degree virtual tours. Our guide compares models, features, and tips to create immersive real estate experiences.
Picking the right camera for your 360° virtual tours really boils down to your budget and what level of quality you’re aiming for. You can get started with an affordable consumer-grade camera, step up to a more versatile prosumer model for better results, or go all-in with a high-end DSLR rig for truly professional work. The key is matching the gear to your goals. Once you've captured your shots, you can build a 360° virtual tour with Pedra.
Your Guide to Virtual Tour Camera Tiers
Choosing a 360° camera can feel a little overwhelming at first. The market is exploding—it's expected to hit USD 10.66 billion by 2033, and new models are popping up all the time. If you want to dive deep into the numbers, you can explore the full 360-degree camera market report, but you don’t need to be a market analyst to make a good choice.
The best way to think about it is like picking a car. Sometimes you just need a reliable sedan to get you from A to B. Other times, you need an SUV for tougher terrain. And for the race track, only a high-performance sports car will do. Each one is perfect for a specific job.
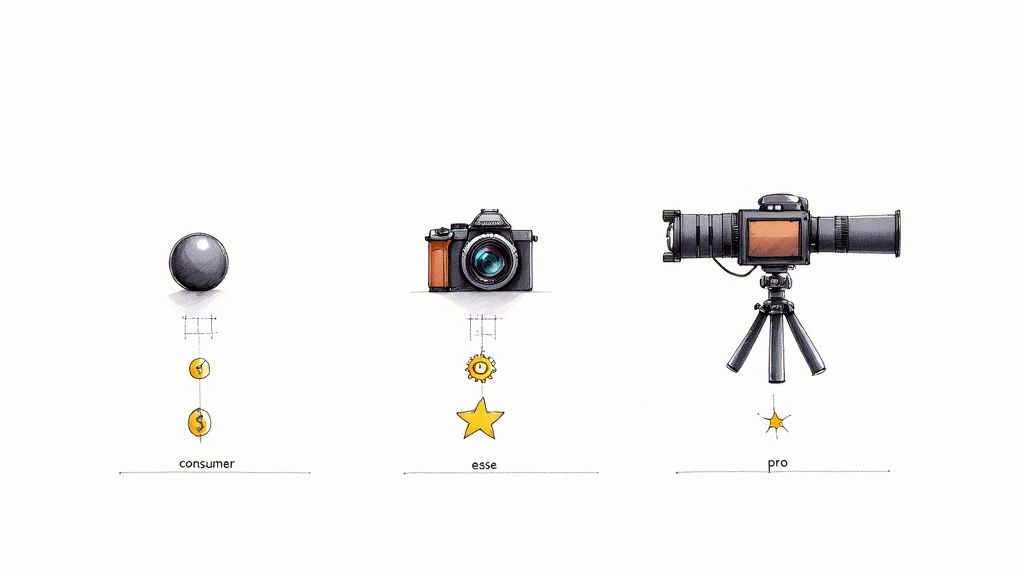
To make this easier, here’s a quick breakdown of the three main tiers.
Quick Guide to 360 Virtual Tour Camera Tiers
| Camera Tier | Best For | Typical Cost | Ease of Use | Image Quality |
|---|---|---|---|---|
| Consumer-Grade | Beginners, small properties, quick turnaround | $300 - $600 | Very Easy | Good |
| Prosumer | Most agents, standard to high-end listings | $800 - $1,500 | Moderate | Excellent |
| High-End DSLR Rig | Professional photographers, luxury & commercial properties | $3,000+ | Difficult | Professional |
As you can see, there’s a clear trade-off between cost, ease of use, and the final image quality. Let's dig into what that means for you.
1. Consumer-Grade Cameras
This is your on-ramp to creating virtual tours. These are almost always "one-shot" cameras, meaning you hit a single button and—poof—you have a full 360° image. They're built for speed and simplicity, making them a fantastic choice for agents just starting out or those who need to capture a property fast.
- Best For: Agents new to 360°, smaller homes, or when speed is the top priority.
- Key Benefit: They’re incredibly easy to use. You can be up and running in minutes.
2. Prosumer Cameras
Moving up to a prosumer camera gives you a serious boost in quality without a huge leap in complexity. You’ll immediately notice better resolution and much better performance in tricky lighting—think rooms with bright, blown-out windows next to dark corners. You also get more manual controls if you want to get creative and dial in the perfect shot.
For most real estate pros, a prosumer camera is the sweet spot. It delivers the kind of high-quality visuals that will genuinely impress clients, but without the steep learning curve or high cost of a professional DSLR setup.
3. High-End DSLR Rigs
This is the top of the mountain. A DSLR rig isn't a single camera; it's a setup where you mount a high-quality DSLR or mirrorless camera on a special panoramic tripod head. You then take a series of individual photos and "stitch" them together later with software. The results are breathtaking—unmatched detail, dynamic range, and resolution.
- Best For: Pro photographers, sprawling luxury estates, and commercial properties where anything less than perfection isn't an option.
- Key Trade-off: The workflow is slow and methodical. It requires a lot of technical skill and time, both on-site and in post-production.
This simple decision tree can help you visualize where you fit in.
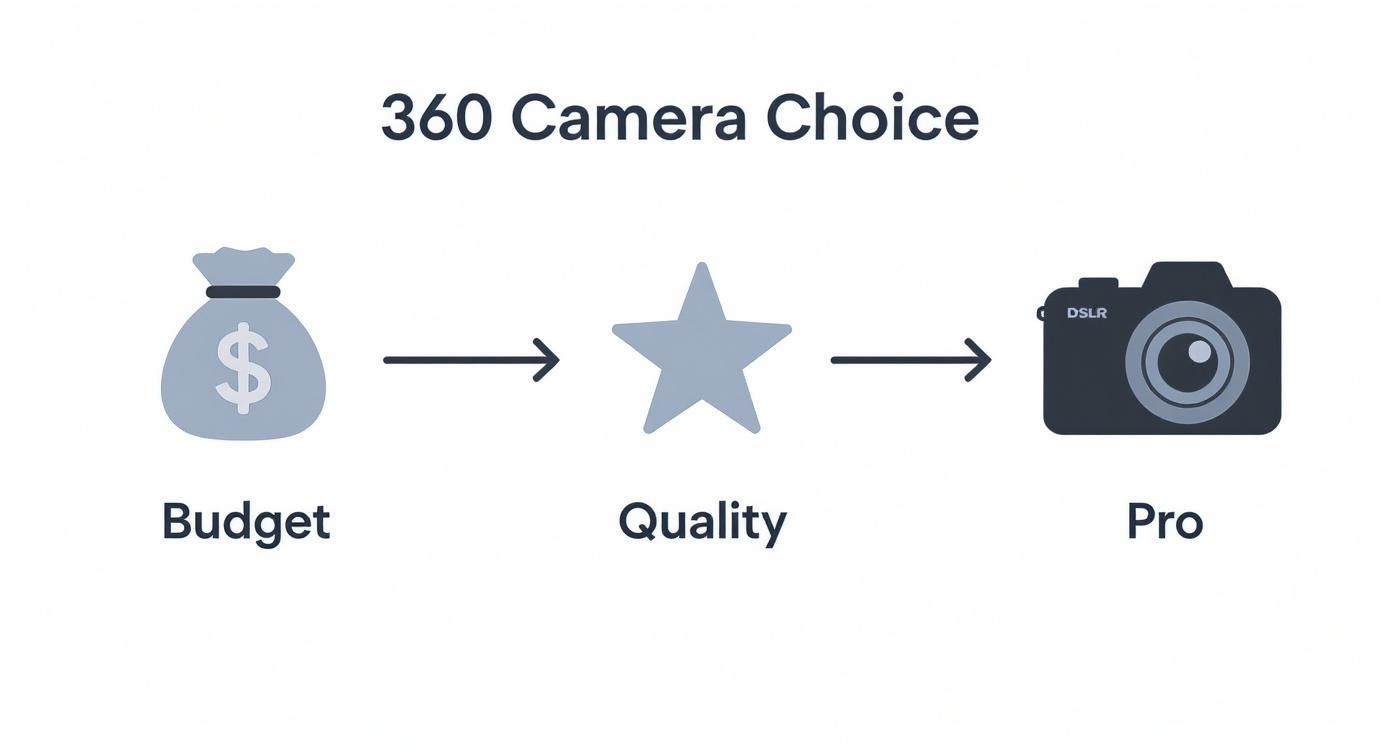
Ultimately, the more you invest—in both money and time—the higher the quality you can achieve. The trick is finding the right balance for your business and your listings.
Decoding the Camera Specs That Actually Matter for Virtual Tours
Alright, so you've got a general idea of what kind of camera you need. Now comes the important part—diving into the technical specs. This is where you can separate a virtual tour that looks decent from one that looks truly professional and polished.
Think of it like this: knowing you need an "SUV" is a good start, but understanding the difference between all-wheel drive, engine size, and cargo space helps you pick the perfect SUV for your lifestyle. The same logic applies here. Let's cut through the jargon and talk about what these features actually mean for your property listings.
Dynamic Range Is Your Secret Weapon
You know that frustrating photo you’ve taken of a beautiful room with a big, bright window? You either get the interior looking dark and gloomy, or the view outside is just a giant white blob. That’s a classic dynamic range problem.
Dynamic range is simply a camera's ability to see detail in both the very bright and very dark parts of a scene at the same time. For real estate, great dynamic range isn't just a bonus; it’s a necessity. It’s what lets a camera capture the gorgeous landscaping outside a sunny window and the rich texture of the hardwood floors inside, all in one shot. It makes the final image feel balanced and true-to-life, just like you’d see it with your own eyes.
A camera with poor dynamic range forces you to sacrifice parts of your image. A great camera lets you show off the entire scene—from the sunlit patio to the cozy reading nook—in a single, compelling shot.
Resolution: It's Not Just About Megapixels
For years, camera marketing has hammered one thing into our heads: more megapixels are always better. But for virtual tours, the story is a bit more nuanced. High resolution isn't about printing a massive billboard; it's about giving potential buyers the freedom to truly explore a space.
A high-resolution 360° image lets a viewer zoom in on the details that matter to them without the picture falling apart into a blurry mess. They can get a close look at the granite countertops, inspect the tile in the shower, or admire the crown molding. This ability to digitally "walk up" to a feature is what makes a virtual tour feel so immersive and powerful.
Focus on image clarity and sharpness more than just the raw megapixel number. A 12K resolution sounds amazing, but if the lenses are cheap or the image processing is weak, the final shot can still look soft and disappointing.
The Invisible Art of Good Stitching
A one-shot 360° camera works by using at least two super-wide-angle lenses to see everything at once. The camera's software then "stitches" these images together into one seamless, spherical photo. When it's done well, you'll never even know it happened.
But when it's done poorly, the illusion is completely shattered. You’ll see obvious vertical lines, warped objects like a bent doorframe, or weird shifts in color where the two images meet. These stitching errors are a dead giveaway of an amateur tour. The best cameras have sophisticated software built right in that makes these seams virtually invisible.
The Essential Gear You Can't Skip
The camera might be the star of the show, but a couple of supporting actors are absolutely critical for getting professional results.
- A Sturdy Tripod: Even the tiniest bit of camera shake can introduce blur and create major stitching problems in a 360° photo. A solid, stable tripod is probably the single most important accessory you can own. Check out our comprehensive guide to essential real estate photography equipment for more tips.
- Flexible File Formats (RAW): Most entry-level cameras shoot in JPEG, a compressed file format that discards a lot of data to save space. Higher-end models give you the option to shoot in a RAW format (like .DNG). RAW files are a game-changer because they capture all the data from the camera's sensor. This gives you incredible flexibility in post-production to adjust brightness, pull details out of shadows, and fine-tune colors with way more precision.
The demand for this kind of immersive content is exploding. In fact, forecasts predict the global 360-degree camera market could skyrocket to USD 21.3 billion by 2035, a huge leap from USD 2.4 billion in 2025. You can dig into the numbers in this extensive market analysis about 360-degree cameras to see just how fast this technology is growing.
Great Virtual Tours Don't Require a Hollywood Budget
You absolutely do not need to spend a fortune to create stunning, professional-looking virtual tours. In fact, some of the best 360° cameras for real estate are surprisingly affordable, striking a perfect balance between power, simplicity, and price. It’s not about finding the cheapest camera, but about making a smart investment.
The right budget-friendly camera can quickly become the most valuable tool in your marketing kit. It’s your secret weapon for creating immersive listings that grab a buyer’s attention and keep them clicking. Let’s dive into a couple of standout models that have become go-to choices for agents everywhere.
The Insta360 X Series: The All-Around Workhorse
There’s a good reason the Insta360 X series (like the popular X3 or newer X4) is so frequently recommended. It perfectly nails the sweet spot between ease of use and high-quality results. Think of it as the ultimate "point-and-shoot" for virtual tours—it’s built to deliver great shots with minimal fuss, which is a lifesaver for a busy agent.
Its biggest advantage is the powerful internal processing combined with a fantastic mobile app. You can snap brilliant HDR photos that automatically balance the light from bright windows and dark corners, control everything from your phone (so you’re not in the shot!), and instantly review your work on-site. The whole process is incredibly efficient, getting you from a finished shoot to tour-ready images in no time.
The Ricoh Theta Series: The Image Quality Specialist
While also very easy to use, the Ricoh Theta line—especially the pro-level Z1—is celebrated for its exceptional image quality. It packs larger sensors than most competitors in its price range, and that translates directly into cleaner, sharper, and more detailed photos, particularly in tricky low-light situations.
If your top priority is capturing the absolute best image quality without jumping to a complicated DSLR setup, the Ricoh Theta Z1 is a serious contender. It just excels at producing photos with rich, accurate colors and a level of clarity that makes a property truly shine.
This focus on quality has made it a favorite among photographers who want their final images to have that extra professional punch. It's no surprise that commercial use in real estate is a major force driving the 360° camera market. In fact, by 2025, this segment is projected to hit USD 1.21 billion out of a total global market of nearly USD 3 billion. For a deeper dive into these numbers, you can check out the complete 360-degree camera market segmentation.
Top Budget-Friendly 360 Camera Features
To make your decision easier, here's a quick comparison of what these top budget-friendly cameras bring to the table for real estate professionals.
| Camera Model | Key Feature | Best Use Case | Estimated Price |
|---|---|---|---|
| Insta360 X3/X4 | Fantastic HDR processing and a super-intuitive mobile app. | Agents who need a fast, reliable, "get-it-done" workflow without sacrificing quality. | $450 - $500 |
| Ricoh Theta Z1 | Large 1-inch sensors for superior low-light performance and image clarity. | Professionals prioritizing top-tier image quality for high-end or challenging properties. | $1,050 |
Ultimately, both are excellent choices. The Insta360 is all about speed and simplicity, while the Ricoh Theta Z1 is for those who want to squeeze out every last drop of image quality.
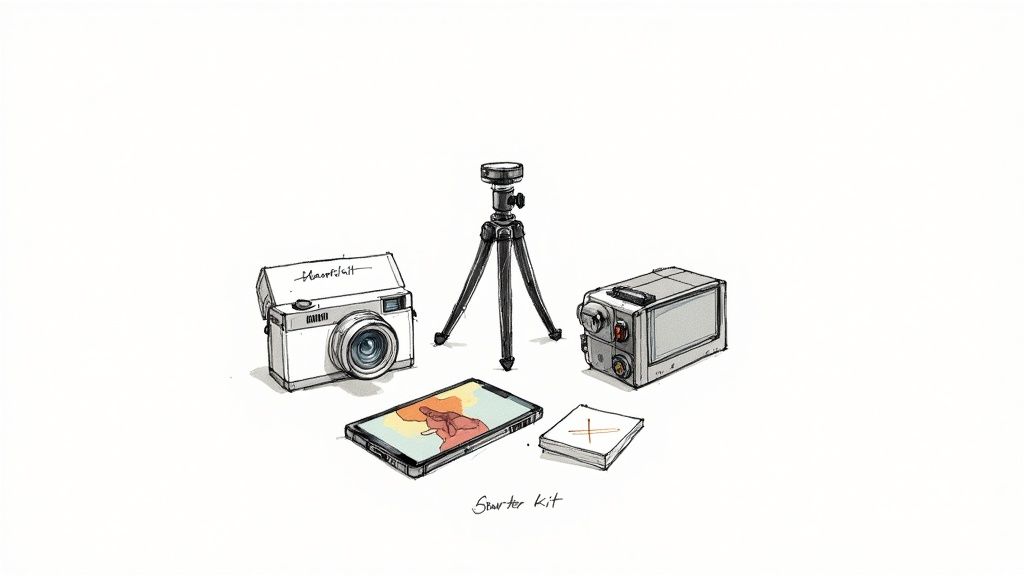
Building Your Budget-Friendly Starter Kit
Your camera is the star of the show, but it can't do the job alone. A few key accessories will make your shoots smoother, more stable, and far more professional. You don’t need a lot, but these items are non-negotiable.
Here’s a simple, effective, and affordable setup:
- Your Camera of Choice: Either the Insta360 X3/X4 or the Ricoh Theta Z1.
- A Sturdy, Lightweight Tripod: Find one that can extend to eye level (around 5 feet) but is light enough to carry around easily. A monopod with small, fold-out feet is also a fantastic, compact alternative.
- Lens Guards: The lenses on a 360° camera are completely exposed and very easy to scratch. A simple set of lens guards is cheap insurance against a very expensive repair.
- A Microfiber Cloth: Dust and fingerprints are the enemy of a clear shot. Always have a clean cloth to wipe the lenses down before you start shooting a new room.
Of course, even the best gear needs the right technique behind it. To really make your photos pop, take a look at our guide on choosing the best camera for real estate photography to learn more about core principles that will elevate your work, no matter which camera you use.
With this simple kit in hand, you’ll have everything you need to start creating professional virtual tours that make your listings unforgettable.
Mastering Your On-Site Shooting Workflow
Having a great 360° camera is just the start. The real magic happens on-site. Your technique—how you prep a room, place the camera, and handle the light—is what turns a simple collection of photos into a truly compelling experience for buyers.
Think of yourself as the director of a small film, not just the photographer. Every shot needs a purpose. It should guide the viewer's eye and tell the story of the home. Nailing down a repeatable workflow is the key to making every shoot efficient, professional, and stunning. If you also produce property videos alongside your tours, our guide on videography for real estate covers the additional equipment and techniques that translate well from 360° work.
Pre-Shoot Preparation: The Foundation of a Flawless Tour
Honestly, the most important work happens before your camera even comes out of the bag. A well-prepared space is faster to shoot and looks a million times better, saving you a ton of editing headaches down the road. You're aiming for an idealized, yet still authentic, version of the property.
Start by decluttering every surface. That means personal photos, magnets on the fridge, and toiletries in the bathroom have to go. This simple step helps potential buyers imagine their own lives in the home.
- Let the Light In: Open every curtain and blind. Don't be shy. You want as much natural light flooding in as possible. Then, turn on every single light—lamps, overheads, even under-cabinet lights.
- Check Your Bulbs: Make sure all the lightbulbs in a room are the same color temperature. A mix of warm yellow and cool white light looks distracting and unprofessional in a photo.
- Wipe Everything Down: Clean all the reflective surfaces. I'm talking windows, mirrors, countertops, and stainless-steel appliances. Smudges and fingerprints show up more than you'd think.
Getting this prep work right is non-negotiable. It sets the stage for everything that follows.
Strategic Camera Placement and Height
Where you stick your tripod can make or break the tour's flow. Bad placement makes a room feel cramped or confusing. Smart positioning, on the other hand, creates a natural, intuitive walkthrough that feels right.
The number one rule? Maintain a consistent camera height from room to room. I've found that about five feet (or 1.5 meters) is the sweet spot, as it closely mimics a person's natural eye level. This consistency is what makes moving between rooms feel smooth and not at all disorienting.
Placing your camera at a consistent, natural eye level is the secret to making a virtual tour feel like a genuine walkthrough. Inconsistent heights can be jarring and break the sense of immersion you're working so hard to create.
When it comes to where to place the camera, doorways are your best friend. Setting the tripod in the threshold between a living room and a kitchen, for instance, creates a natural pivot point. It lets viewers peek into both spaces from one spot before deciding where to go next—just like we do in real life.
The Art of Hiding in Plain Sight
The funny thing about 360° photography is that the camera sees everything—and that includes you. Learning how to hide from your own shot is a skill you'll master quickly. Thankfully, most modern 360° cameras let you shoot remotely with a smartphone app, which makes this a whole lot easier.
For every shot, just follow this simple process:
- Set Your Shot: Position the tripod and get your framing just right.
- Connect to Your Phone: Open the camera's app to get a live preview.
- Find a Hiding Spot: Duck into the next room, a big closet, or behind a sofa—anywhere out of the camera's line of sight.
- Trigger Remotely: Tap the shutter button on your phone. Give it a few seconds to finish the capture before you pop out.
Make this a habit, and you’ll never accidentally photobomb your own tour in a mirror reflection. To really elevate your work, it’s worth digging into some essential composition techniques for photography, as the core principles still apply.
Bringing Your Tour to Life with Pedra AI

This shot of the Pedra AI interface really shows how clean and simple creating a virtual tour can be. It's all about turning a complicated job into just a few clicks.
Getting those stunning 360° photos is a great first step, but it's really only half the battle. The raw image files, even from the best cameras for 360 degree virtual tours, are just a starting point. To truly wow a potential buyer, those images need to be stitched together, cleaned up, and assembled into a smooth, interactive walkthrough of the property.
In the past, this post-production work was a real headache. It meant sinking hours into expensive, complicated software to manually connect rooms, fix colors, and build a tour that actually made sense. This is exactly where platforms like Pedra AI completely change the game.
From Raw Photos to Polished Tour in Minutes
The whole idea behind a tool like Pedra AI is to give you professional results without the professional-level effort. Forget about bouncing between different programs and getting lost in technical settings. The process is dead simple: you upload your 360° images, and the AI handles the rest.
This isn't just a time-saver. It’s about getting a consistent, high-quality finish across all your tours that’s tough to achieve by hand, especially when you're busy. The AI looks at each photo and makes smart adjustments to ensure the final tour feels cohesive and polished.
Here’s a look at what happens behind the scenes:
- Flawless Stitching: The AI perfectly merges the images from your camera's lenses, getting rid of those ugly seam lines or weird distortions that can instantly ruin the experience for a viewer.
- Intelligent Enhancements: It automatically fixes common problems like weird lighting differences between rooms, off-kilter color balance, and lens warping, making every space look its absolute best.
- Logical Tour Creation: The system figures out the layout of the property from your photos and builds an intuitive navigation path, adding "hotspots" so users can move from one room to the next just like they would in real life.
This kind of automation makes high-end tour creation accessible to anyone. You no longer need to be a photo editing wizard to get results that look like you are.
The Power of AI in Post-Production
The real magic of an AI-driven platform is how it takes the most complex, time-consuming tasks off your plate. Think of it as having an on-demand editing team. Beyond just the camera work, artificial intelligence is key to refining virtual tours. For a broader look at this topic, you can read up on AI integration strategies in post-production.
With a tool like Pedra, you can get back to what you're good at—staging homes, talking to clients, and closing deals—while the tech handles the tedious stuff.
By automating the most frustrating parts of building a tour, AI platforms get you away from the computer and let you create more marketing material in a fraction of the time. This means you can offer a professional virtual tour for every listing, not just your luxury properties.
Adding extra features becomes incredibly easy, too. You can drop in info tags on appliances, add links to neighborhood guides, or even embed short video clips to show off a unique feature. This turns a simple walkthrough into a genuinely helpful and engaging experience for a buyer.
If you’re ready to see how this can make your listings stand out, you can learn more about creating AI-powered virtual tours with Pedra and see it in action. It's the final, and most important, step in turning your hard work behind the camera into a powerful sales tool that’s working for you 24/7.
Common Virtual Tour Questions Answered
Diving into 360° virtual tours can bring up a lot of questions. You’ve got the gear and you know the basic steps, but a few nagging uncertainties can really slow you down on a shoot.
This section is all about clearing those hurdles. We're going to tackle the most common questions that pop up, from a bit of tech talk to practical, on-the-ground challenges. Think of this as your quick-reference guide to shooting with total confidence.
Can I Just Use My Smartphone for Virtual Tours?
Look, modern smartphone cameras are amazing, but for professional virtual tours, they just don't cut it. A dedicated 360° camera is built for one purpose: capturing a seamless, complete spherical image in a single shot.
Trying to do the same thing with a phone means taking dozens of individual pictures and hoping they stitch together. This almost always leads to a few major problems:
- Bad Stitching: You'll see obvious seams, crooked lines, and warped furniture that completely shatters the immersive experience.
- Patchy Lighting: The lighting changes just enough between each shot to create a messy, inconsistent look.
- It Takes Forever: A single 360° shot takes one second. Trying to replicate that with a phone can take 5-10 minutes per room. That's not a viable workflow for an entire property.
For a polished, professional result that actually wows clients, a dedicated 360° camera is the only way to go.
How Much Storage Space Do I Need for Tour Photos?
The file size of your 360° photos really comes down to your camera's resolution and the format you’re shooting in. A high-quality JPEG might land somewhere around 20-30 MB, but if you're shooting in RAW, that same image could easily be 50-70 MB.
Let’s put that in perspective. A typical 2,000-square-foot home might need 15-20 shots to cover everything well. Do the math, and a single property shoot can chew through anywhere from 400 MB to over 1.5 GB of data. It's always, always better to have more space than you need.
Pro Tip: Don't skimp on memory cards. Grab a few large, high-speed cards (64 GB or 128 GB is a great starting point). This way, you won’t get caught with a full card mid-shoot, and you can keep different client projects organized on separate cards.
What Is the Difference Between a 360 Tour and a 3D Tour?
This is a big one. People often use these terms interchangeably, but they describe two very different technologies and create different experiences. Getting this right helps you set clear expectations with your clients.
A 360 virtual tour is made by linking together a series of individual spherical photos. You stand in one spot, look all around, and then click a hotspot to "jump" to the next photo. It’s like moving between a series of crystal-clear, immersive bubbles.
A 3D virtual tour (often called a "digital twin") is created with special cameras that use infrared to capture depth data. This builds a geometrically accurate 3D model of the property. Users can move more fluidly through the space and often see that cool "dollhouse" view of the whole layout.
While 3D tours are impressive, a well-executed 360 tour made with excellent cameras for 360 degree virtual tours delivers a fantastic and much more cost-effective immersive experience that is perfect for the vast majority of real estate marketing.
How Long Does It Take to Shoot a Typical Property?
The time you spend on-site really boils down to two things: the property's size and how prepared it is. A clean, staged, and decluttered home is a breeze to shoot compared to one where you have to move things around in every room.
As a rough guideline for a prepped property:
- Small Apartment or Condo (Under 1,200 sq. ft.): 30-45 minutes
- Standard Family Home (1,500 - 2,500 sq. ft.): 60-90 minutes
- Large Property (3,000+ sq. ft.): 2 hours or more
Remember, this is just shooting time. Always build in a buffer for setting up your gear, breaking it down, and doing a quick walkthrough with the agent or homeowner to map out your shots. A calm, unhurried workflow is the secret to getting great results every time.
Ready to transform your stunning 360 photos into a polished, interactive virtual tour in minutes? With Pedra, you can upload your images and let our AI handle the stitching, enhancement, and tour creation automatically. Start creating professional virtual tours today with Pedra.

Related Posts
7 Ways AI for Real Estate Is Transforming the Industry in 2026
Explore how AI for real estate is reshaping the market in 2026: valuation, predictive analytics, vir...
Digital Real Estate Agency: A 2026 Guide to Transforming Your Brokerage
Run a digital real estate agency that closes faster: tools, automation, visual presentation and a st...
8 Facebook Marketing Ideas for Real Estate in 2026
Explore our top 8 Facebook marketing ideas for real estate in 2026. This guide covers paid ads, orga...
Real Estate Floor Plans 2026 - Win More Listings
Master real estate floor plans to win listings and engage buyers. Learn to create and use 2D and 3D ...
10 Home Exterior Renovation Ideas to Boost Curb Appeal in 2026
Discover 10 home exterior renovation ideas to boost curb appeal in 2026, from siding and stone accen...
Home Staging Tips: 8 Ways to Sell a Home Faster in 2026
Looking to sell a property faster and for top dollar? These eight essential home staging tips will s...