Commercial Real Estate Photography: Pro Guide (2026)
Commercial real estate photography in 2026: pro techniques for planning, shooting, and editing property images that win investors and tenants. Full guide inside.
Commercial real estate photography isn't just taking pictures—it's building the single most important marketing tool for a multi-million dollar asset. That first impression is everything: it's what grabs serious investors and tenants and gets them to book a viewing before they've even seen the place in person. In 2026, with most deals starting online, the quality of your imagery is often what turns casual browsers into signed leases.
This guide walks through the gear, planning, shooting, and editing techniques that separate amateur shots from professional ones—and how Pedra fits into the workflow if you want to enhance and stage images quickly. If you also handle homes and apartments, pair this with our broader guide to real estate photography.
Why Professional Photos Are Non-Negotiable
In the cutthroat world of commercial properties, professional imagery isn't a nice-to-have; it's a fundamental requirement. The very first time a potential client sees a property, it's almost always going to be online. Your images need to do more than just show four walls—they have to sell the space, its potential, and its unique value.
Let's be honest, amateur smartphone pictures or poorly lit shots just won't cut it. They can instantly make a prime asset look cheap, sending a message of neglect or a lack of professionalism.
On the flip side, a portfolio of sharp, thoughtfully composed images becomes a powerful sales tool. It signals that you’re serious and builds immediate trust with brokers, investors, and business owners. To really grasp the impact, it’s worth looking into different real estate photography use cases to see how quality visuals drive results for all kinds of properties.
How Photos Directly Affect Sales and Value
The numbers don't lie. Listings with high-quality photos consistently blow their competitors out of the water in ways you can actually measure. This is about more than just aesthetics; it's about delivering better business results for your clients.
- Faster Deals: Great photos pull in more qualified leads, which means less time on the market.
- Higher Perceived Value: The better a property looks, the easier it is to justify a higher asking price and attract top-tier tenants or buyers.
- A Stronger Brand: When agents and brokers consistently use high-end photography, it builds their reputation as a premium, professional operation.
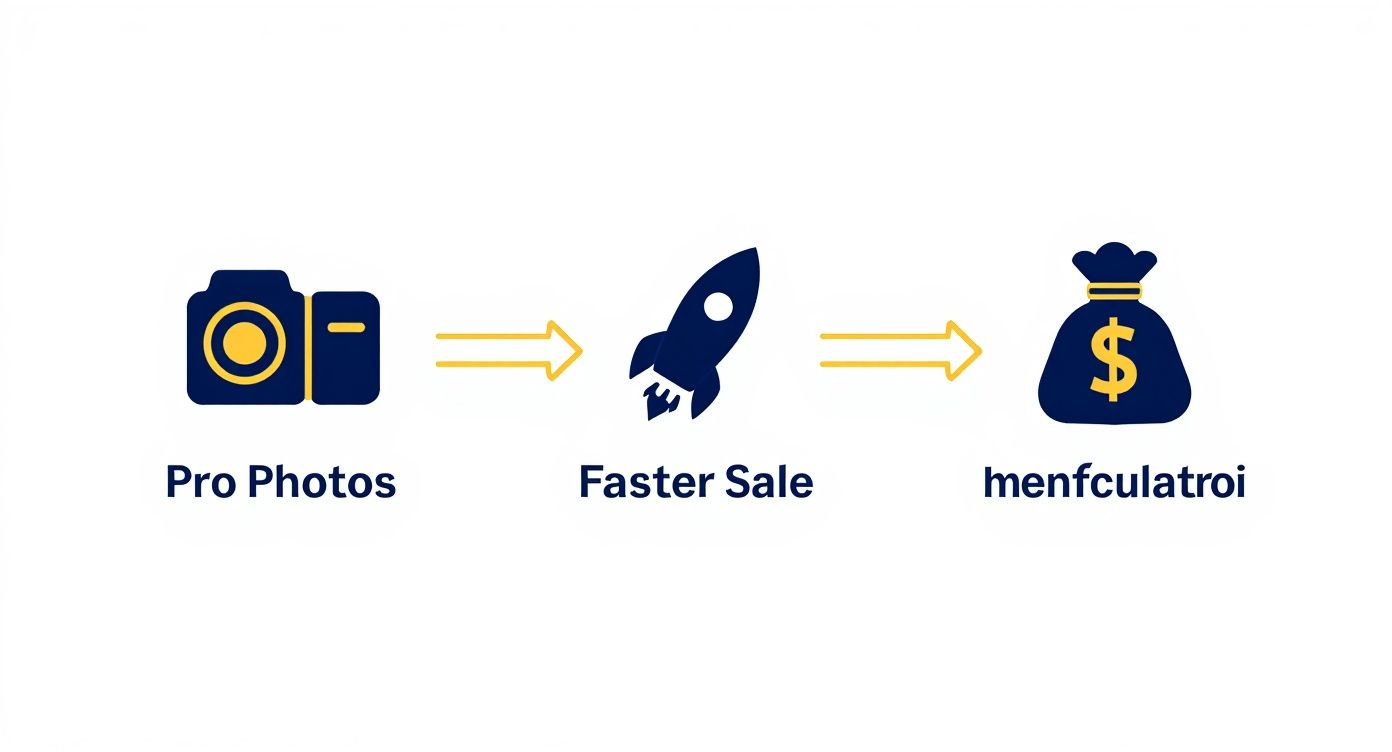
The data is pretty clear: listings with professional photos sell 32% faster than those without. Throw in some aerial drone shots, and you can speed up the sales process by as much as 68%.
That massive difference shows just how much well-planned visual assets can impact a property's performance in the market. When you invest in great photography, you're really investing in the property's success.
Strategic Planning Before You Shoot
Great commercial real estate photography doesn’t just happen. It’s the result of careful, deliberate planning that starts long before you even pick up your camera. This foundational phase is where you lock in the client's goals and make sure every single photo has a purpose.
Think about it: without a solid understanding of the property and who it's for, you're just taking nice pictures of a building. But with a plan, you're creating a powerful marketing tool designed to hook a specific tenant or buyer.
Running an Effective Client Discovery Session
Your first move should always be a deep dive with the client. This isn't just a quick chat; it's a strategic meeting to figure out what makes this property tick. You need to get inside the heads of the agent, the owner, and, most importantly, the person who will eventually use the space.
Put on your detective hat. What’s the real story here? Is it a downtown office with killer city views and easy access to the train? Or maybe it's a massive warehouse where the key features are the 30-foot ceilings, multiple loading docks, and sheer square footage. You won't know until you ask.
To get the full picture, here are a few questions I always ask:
- Who is the dream tenant or buyer for this property?
- What are the top three to five features we absolutely must capture?
- Are there any unique architectural details or recent upgrades we should focus on?
- What’s the overall vibe we want the photos to communicate? (e.g., modern and energetic, or established and professional?)
Knowing the target audience changes everything. The photos for a hip tech startup scouting a new office will look and feel completely different from those for a traditional law firm that needs to project an image of prestige and privacy. Your images need to speak their language.
Building Your Definitive Shot List
Once you know the story you’re telling, it's time to build your shot list. This is your game plan for the shoot day. It keeps you focused, efficient, and ensures you walk away with every critical angle covered, leaving no room for "I wish we'd gotten a shot of..." later on.
A one-size-fits-all list just doesn't cut it for commercial properties. You have to adapt. A retail space needs shots that highlight foot traffic patterns and storefront visibility. A multi-family building, on the other hand, needs to show off community amenities like the fitness center, pool, and resident lounge.
Pro Tip: Always build the shot list with your client. They know the property's best-kept secrets and most valuable assets. Getting their input upfront prevents any surprises and makes them feel like a partner in the process.
Here’s a look at how I break down shot lists for different commercial property types.
Essential Shot List for Commercial Properties
A well-structured shot list is your best friend on-site. It ensures comprehensive coverage and aligns your work with the client's marketing goals from the start.
| Property Type | Exterior Shots | Interior Shots | Detail & Amenity Shots |
|---|---|---|---|
| Office Building | Hero shot (dusk/dawn), entrance, parking, building directory | Lobby, typical floor layout, conference rooms, executive offices | Kitchen/break room, fitness center, common areas, unique architectural features |
| Retail Space | Wide storefront, street view with signage, customer entrance, parking lot | Main sales floor, checkout area, backroom/storage, fitting rooms | Window displays, product shelving, specific brand fixtures, foot traffic flow |
| Industrial/Warehouse | Loading docks, truck court, entire building exterior, employee parking | High-ceiling wide shots, floor space, office section, mezzanine | Sprinkler systems, bay doors, lighting, power infrastructure details |
| Multi-Family/Apt | Building facade, entrance, landscaping, aerial view of property | Model unit(s), lobby, mailroom, leasing office, hallways | Pool, gym, clubhouse, business center, pet-friendly areas, in-unit finishes |
This list is a starting point, but it shows how different properties demand a completely different photographic approach.
The right preparation doesn't just lead to better photos—it directly impacts the client's bottom line.
As you can see, starting with a professional, well-planned photoshoot is the first step toward a faster sale and a higher price. This planning phase is the engine that drives those results, making it the most critical part of any commercial photography project.
Your Essential Camera Gear and Settings
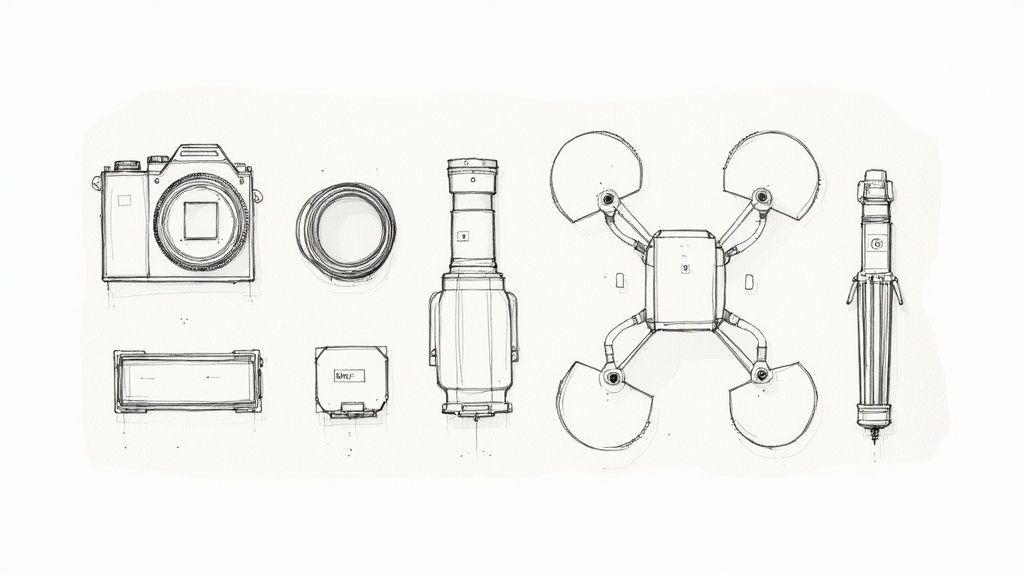
Walking onto a commercial property with the right gear isn't just about looking the part—it's about having the tools to deliver the quality that brokers and developers expect. You can't capture the sheer scale of a warehouse or the subtle details of a Class A office with a starter kit. Investing in a solid setup is non-negotiable.
The foundation of any pro kit is a full-frame camera. The larger sensor is a game-changer, pulling in more light and detail, which translates to cleaner, crisper images. This is especially true in the notoriously tricky mixed lighting of large commercial interiors.
A full-frame sensor also gives you the true focal length of your lenses, which is absolutely critical for making an open-plan office feel expansive without weird distortions. While there are tons of great bodies out there, understanding why full-frame matters will help you pick the best camera for your real estate photography business.
Lenses That Make or Break the Shot
Honestly, your glass is probably more important than your camera body. For commercial jobs, you need lenses that can handle everything from a towering skyscraper to the fine finishes in a corporate boardroom.
-
Wide-Angle Lens (16-35mm): This will be your go-to for almost every interior. It lets you fit the whole room in the frame, making spaces feel open and impressive. A word of caution: don't push it too wide. You'll end up with distorted, fun-house-mirror walls that look totally unrealistic.
-
Tilt-Shift Lens (17mm or 24mm): This is the pro's secret weapon for exteriors. A tilt-shift lets you correct perspective, so tall buildings stand perfectly straight and powerful instead of looking like they’re leaning back. It's a single piece of gear that can instantly elevate your work from good to high-end architectural quality.
A rock-solid tripod isn't an optional accessory—it's essential. It allows you to shoot at slower shutter speeds for maximum sharpness and is absolutely necessary for techniques like exposure bracketing to create perfectly lit images.
Mastering Light, No Matter the Weather
Relying on natural light alone is a recipe for disaster. A good set of off-camera flashes or strobes is your ticket to full control. With strobes, you can fill in dark corners, overpower the harsh afternoon sun coming through a window, and create bright, inviting images even on a gloomy day.
Pair your strobes with modifiers like softboxes or umbrellas. This will soften the light, killing harsh shadows and giving you a much more natural, flattering look. This level of control is what truly separates a professional from an amateur.
My Go-To Camera Settings
Every property presents its own challenges, but walking in with a solid baseline for your settings will save you a ton of time. These are designed to nail the sharpness and quality that commercial clients demand.
| Setting | Recommendation | Why It Works |
|---|---|---|
| Shooting Mode | Manual (M) | You need full control to keep your exposures consistent from one shot to the next. No exceptions. |
| Aperture | f/8 - f/11 | This is the sweet spot for a deep depth of field, keeping everything from the desk in front to the windows in back tack sharp. |
| ISO | 100 - 400 | Keep it low. This minimizes digital noise and gives you the cleanest possible image. |
| Shutter Speed | Adjust as needed | With your camera locked down on a tripod, you can slow the shutter way down to get a perfect exposure without any camera shake. |
Finally, you have to think from the air. A quality drone, like a DJI Mavic or Phantom, has become a must-have for real estate videography. It's the only way to truly show a property's scale, its position in the neighborhood, and all the surrounding roads and amenities. A bird's-eye view provides context that you just can't get from the ground.
Mastering Composition and Lighting

This is where your technical skills and creative eye really come together. In commercial photography, composition isn’t just about making a pretty picture; it’s about guiding a potential buyer’s gaze and showing them what's possible in that space. Every single angle you choose tells a story.
Think about shooting a massive, open-plan office. I often use rows of desks or even architectural beams as leading lines. They create a natural path for the eye, pulling the viewer deeper into the image and making the space feel expansive. On the other hand, for a towering skyscraper, I’ll get down low and shoot upward. That simple trick instantly conveys a sense of power and prestige.
Compositional Strategies for Different Spaces
You can’t use a one-size-fits-all approach. A tight retail space demands a completely different strategy than a cavernous warehouse. You have to adapt.
- Making Small Spaces Feel Larger: Shoot from a corner with a wide-angle lens. Be careful not to overdo it and cause distortion, but this technique is fantastic for maximizing visible floor space and making a room feel more open.
- Showcasing Volume in Warehouses: It's all about height. Get shots that capture both the floor and the high ceilings. This emphasizes the vertical space, which is a huge selling point for industrial clients who need room for tall racking or heavy equipment.
- Highlighting a Building's Grandeur: For exterior shots, try framing the main building with something in the foreground, like trees or even neighboring structures. This gives the property context and makes it feel more prominent.
These aren't just artsy tricks; they're business decisions. Getting composition right directly impacts how desirable a property appears. The numbers back this up, too. Properties with professional photos can command a 47% higher price per square foot and often sell for thousands above asking.
Demystifying Advanced Lighting Techniques
Great lighting is everything in this business. You can’t just walk in and rely on whatever light is available; that's a recipe for disaster. If you want bright, clean, and true-to-life images, you need to bring your own lighting expertise.
The goal is to create an image that feels naturally bright and accurately represents the space, eliminating harsh shadows and balancing the bright exterior with the darker interior.
Two of my go-to methods are exposure bracketing (HDR) and the flambient technique. For HDR, you're essentially taking a series of photos at different brightness levels and then blending them together in post-production. It's a reliable way to get a perfectly exposed shot.
The flambient method is a bit more hands-on but gives you incredible control. You take one shot using your flash to light up the interior and another using only the ambient (natural) light. Then, you blend them. This lets you capture the best of both worlds—a bright room and a natural-looking atmosphere. For a deep dive, we have a complete guide to mastering real estate photography lighting.
By learning these techniques, you'll be able to deliver consistently beautiful images that make your clients' properties pop off the screen.
Modern Post-Production and Editing Workflow
Getting the shot is only half the battle. The real magic in commercial real estate photography happens on the computer, where you turn solid raw files into polished, high-impact marketing assets. A reliable editing workflow is your best friend here—it’s what allows you to deliver consistent, top-quality work on tight deadlines.
Every project should start with the fundamentals. I always begin by culling the images, quickly flagging the keepers and ditching the rest. From there, it's into a program like Adobe Lightroom for the initial, broad-stroke adjustments that set the foundation for every photo.
The Essential Editing Checklist
Before I even think about advanced retouching, every single image goes through a non-negotiable quality check. Getting these three things right is the difference between a professional gallery and a sloppy one.
- Straighten Your Lines: This is always the first thing I fix. I use the transform tools to get all vertical and horizontal lines perfectly straight. Nothing screams "amateur" faster than leaning walls or a crooked horizon.
- Correct Color and White Balance: Commercial spaces are notorious for mixed lighting—fluorescents mixing with daylight, for example—which creates weird color casts. You have to neutralize them so the whites are actually white and the colors look true-to-life.
- Exposure and Contrast Adjustments: The goal is an image that feels bright and inviting. I’ll lift the shadows to show detail in dark corners and pull back highlights so windows aren't just blown-out white blobs. A little pop of contrast brings everything to life.
Once these basics are dialed in, I’ll often jump into Adobe Photoshop for the fine-tuning. This is where I'll remove distractions like scuff marks on the floor, stray electrical cords, or annoying reflections.
Elevating Images with Modern Enhancements
The basics give you a clean, accurate photo. But today’s tools allow us to do so much more to meet—and exceed—client expectations. This is where you add serious value and help a property move.
Virtual staging has completely changed the game, especially for vacant commercial spaces. It’s tough for a potential tenant to look at an empty concrete box and imagine their bustling office or trendy retail shop. By digitally adding stylish furniture, desks, and decor, you’re not just showing a space; you’re showing its potential. In fact, doing this can make a property 75% more likely to sell faster.
Post-production is no longer just about correction; it's about creation. Tools like virtual staging and AI enhancements allow you to sell the potential of a property, not just the empty shell.
On top of that, AI-powered tools are now handling tasks that used to eat up hours of my time. Need to swap a gray, overcast sky for a perfect blue one? There are tools that do it in a click, and the results are incredibly realistic. Sharpening, noise reduction, and even upscaling an image's resolution are faster and better than they've ever been.
If you want to see what's out there, it's worth exploring the different real estate photography editing software available. Getting comfortable with these tools doesn't just save you time; it directly improves the quality of the final product you hand over to your client.
Pricing Your Work and Delivering Final Images
Figuring out how to price commercial real estate photography is less about a simple menu and more about a strategic conversation. You're not just selling photos; you're providing a critical marketing asset. Unlike residential shoots where a flat rate might work, commercial projects are all over the map, so your pricing has to be just as flexible.
A small retail shop needing 10-15 solid images could work well with a per-image price. But for a sprawling industrial park or a multi-floor office building, a day rate makes way more sense. It accounts for the sheer amount of time you'll spend on-site capturing every angle and feature.
Structuring Your Pricing Packages
When you build a quote, you've got to think about everything that goes into the final product. Your fee isn't just for the hours you spend with a camera in hand. It has to cover the time spent editing, your gear investment, business insurance, and, crucially, how the images will be used.
Here’s what I always factor in:
- Property Size and Scope: Let's be real, shooting a 2,000 sq ft office is a completely different beast than tackling a 200,000 sq ft warehouse. Your pricing has to reflect that.
- Add-On Services: Keep things like drone footage, virtual tours, or those stunning twilight shots as separate line items. This lets clients customize a package that fits their specific marketing goals and budget.
- Image Licensing: This is a big one. Be crystal clear about usage rights. If the images are for a national advertising campaign, that license is worth a lot more than if they’re just going on a local MLS listing.
A detailed, itemized quote does more than just look professional—it shows the client exactly what they're paying for. This simple step helps manage expectations, prevents last-minute requests for "just one more thing," and ensures you get paid for every bit of work you do.
Delivering a Polished Final Product
The shoot might be over, but your job isn't done. How you deliver the final images is your last, best chance to leave a great impression. A clean, professional online gallery branded with your logo makes a world of difference. It shows you care about the entire client experience, from start to finish.
I always provide images in two formats: high-resolution JPEGs perfect for print brochures and web-optimized versions for online listings. It's a small touch, but it saves your client time and hassle, making you look like a total pro.
This all feeds into your bigger business goals. For commercial photographers, mastering the business side is just as important as mastering the camera. Thinking about strategies for growing your online photography business is key to long-term success. The photography market is huge—valued at $55.6 billion in 2023—and with North America holding a 28% share, there's a lot of opportunity. A polished delivery process is one of the best ways to stand out and claim your piece of it.
Your Questions, Answered
Got a few lingering questions about commercial real estate photography? You're not alone. Here are some of the most common things people ask when they're getting started.
How is Commercial Photography Different from Residential?
It really boils down to the audience and the story you're telling.
With residential photography, you're selling a home. The goal is to create an emotional pull, to help a family envision their life in that space. You're focused on warmth, comfort, and lifestyle.
Commercial photography, on the other hand, is all business. You're selling an asset or a workspace. The images need to highlight function, potential, and value. Think loading docks, ceiling heights, office layouts, and the sheer scale of the property. The buyer isn't picturing their kid's birthday party; they're calculating ROI.
What's the Best Time of Day to Shoot Exteriors?
Everyone loves the "golden hour" light you get around sunrise and sunset, and for good reason—it’s soft, warm, and makes almost anything look beautiful. It's a fantastic choice for hero shots.
But for commercial properties, don't discount midday. A bright, sunny shot can showcase a building's vibrancy, how much natural light it gets, and the level of daytime foot traffic in the area, which can be a huge selling point.
For a truly show-stopping image that screams "premium," you can't beat a twilight shoot. The contrast between the building's warm interior lights and the deep blue of the evening sky is pure magic. It’s a look that grabs attention and justifies a higher price tag.
Do I Really Need a Drone License?
Yes, you absolutely do. This isn't a gray area.
In the United States, if you're flying a drone for any commercial reason—and that definitely includes real estate photography—you are legally required to have an FAA Part 107 certificate. Don't risk the hefty fines. Get certified, fly safely, and always follow the rules.
Transform your property listings in seconds with Pedra. Instantly generate virtual staging, photo enhancements, and realistic renders with a single click. Discover the power of AI at https://pedra.ai.

Related Posts
Listing Presentation Templates: Win More Clients
Professional listing presentation templates that close deals. Customizable CMA templates, market ana...
Win More Deals with Your Real Estate Listing Presentation
Master your real estate listing presentation to attract clients and close more deals. Learn expert t...
7 Ways AI for Real Estate Is Transforming the Industry in 2026
Explore how AI for real estate is reshaping the market in 2026: valuation, predictive analytics, vir...
Digital Real Estate Agency: A 2026 Guide to Transforming Your Brokerage
Run a digital real estate agency that closes faster: tools, automation, visual presentation and a st...
8 Facebook Marketing Ideas for Real Estate in 2026
Explore our top 8 Facebook marketing ideas for real estate in 2026. This guide covers paid ads, orga...
Real Estate Floor Plans 2026 - Win More Listings
Master real estate floor plans to win listings and engage buyers. Learn to create and use 2D and 3D ...