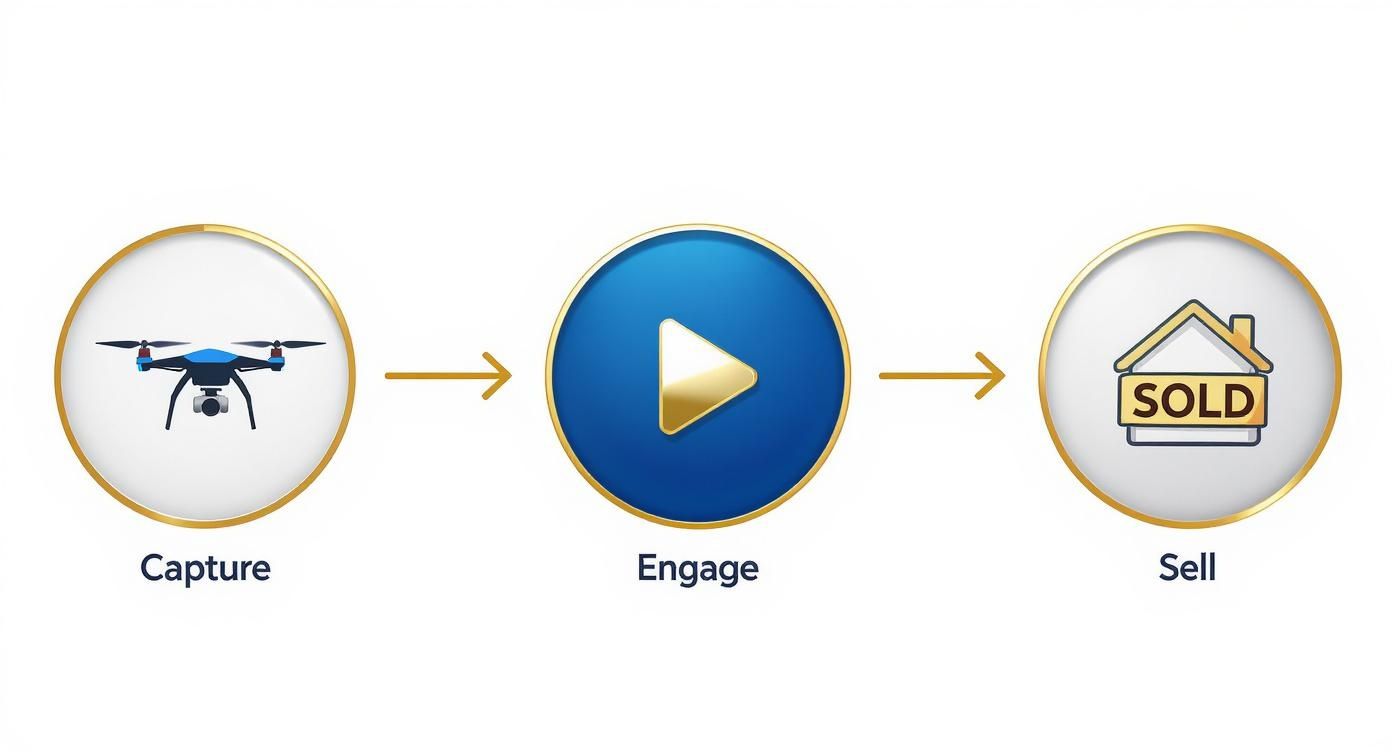
Drone Real Estate Video Guide for Faster Sales
Discover how a professional drone real estate video can capture stunning aerial views, attract more buyers, and help you sell properties faster.
Let's be honest, standard ground photos just don't cut it anymore. A drone video gives buyers a perspective that nothing else can—they get to see the entire property, its layout, and how it fits into the neighborhood, all in one seamless shot. This is what brings in the serious buyers.
Why Drone Video Is a Game-Changer for Real Estate
Think about it from a buyer's perspective. Ground-level photos always leave questions unanswered. Aerial footage fills in those blanks instantly, showing off the property's true scale, its proximity to that great park down the street, or the actual size of the backyard.
What this really does for your listing is:
- Eliminate blind spots by showing the complete property perimeter.
- Highlight location perks like nearby schools, walking trails, or transit.
- Build anticipation with cinematic "reveal" shots as the drone approaches.
- Keep people on your page with visuals that are simply more engaging.
I’ve heard from countless agents that once they add a drone video, the time visitors spend on their listings skyrockets. That extra dwell time is a huge signal to buyers—and to the search engines—that this is a quality listing worth paying attention to.
Buyers make snap judgments. Aerial footage gives them the context they need to make a faster, more confident decision. It answers questions before they're even asked.
Beyond just selling faster, I've seen aerial footage fundamentally change how buyers perceive a property's value. When you can visually showcase a stunning pool, a sprawling yard, or a prime waterfront location from above, it makes justifying a higher asking price that much easier.
It’s not just about showing the house; it's about selling the lifestyle that comes with it.
In fact, the data backs this up. Real estate listings that include drone videos tend to sell around 68% faster than listings that stick to old-school photography. You can read more about these stats on HomeJab.
Let's look at a quick breakdown of how impactful these videos really are.
Impact of Drone Video on Real Estate Listings
| Metric | Performance Boost with Drone Video |
|---|---|
| Listing Views | +94% |
| Buyer Engagement | +118% |
| Sales Velocity | +68% |
These aren't just vanity metrics. They represent real, tangible results that affect your bottom line. Drone video has moved from a "nice-to-have" novelty to a core part of a winning real estate marketing strategy.
Boosting Perceived Value and Building Trust
When a buyer gets that immersive, bird's-eye view, it builds an immediate sense of trust and transparency. They feel like they're seeing the whole picture, with nothing hidden. This perception of quality often translates directly into a willingness to pay a premium.
If you're looking to round out your visual package, I highly recommend checking out our guide on aerial photography for real estate. For a broader look at all types of property video, see our real estate videography guide. Pairing stunning drone stills with your video creates a powerful, cohesive story for your listing.
At this point, adding drone video to your marketing isn't just an option—it’s a necessity for any agent who wants to stand out, attract serious buyers, and close deals faster. Those sweeping panoramic views and smooth cinematic shots will make any property look like a must-see.
Planning Your Aerial Shoot for Success
Great drone footage doesn't just happen. It’s the result of thinking through the entire shoot long before the drone even leaves the ground. If you just show up and start flying, you’ll end up with generic clips that don't do the property justice. It all starts with one simple question.
What's the one thing that makes this property a showstopper? Is it the massive, oak-lined backyard? The private dock on the lake? Maybe it's a rooftop deck with a killer view of the city skyline. Whatever it is, that's your star. Your entire shot list should be built around making that feature look incredible.
What's the Goal Here?
Before you map out a single flight path, figure out the story you're trying to tell.
- Got acreage? The goal is to show off the scale. You’ll want high-altitude shots that capture the sheer size of the land and where the property lines sit.
- Stunning pool? You're selling a lifestyle. Think low, smooth passes over the water and patio, preferably during that perfect late-afternoon "golden hour" light.
- Condo with a view? It's all about perspective. Your shots should focus on revealing that gorgeous skyline or ocean view right from the balcony.
When you have a specific goal, your video becomes more than a simple fly-by. It turns into a persuasive marketing tool that speaks directly to what buyers are looking for.
The Not-So-Fun Part: Legal and FAA Rules
Once you have your creative vision, it's time for a reality check on the logistics and legal stuff. You can't just send a drone up whenever you feel like it, especially for business. The Federal Aviation Administration (FAA) has some very clear rules to keep everyone safe.
Here's the big one: if you're flying a drone to help sell a property, you must have an FAA Part 107 license. This is non-negotiable, and the fines for flying commercially without one can be hefty. On top of that, you have to check for local airspace restrictions. Use an app like B4UFLY to see if the property is near an airport, military base, or national park. These areas often have flight restrictions that require special FAA authorization.
This infographic breaks down how a little bit of planning leads to a much better outcome.
It’s a simple formula: better aerial shots grab more eyeballs, which leads to more interest and, ultimately, a faster sale.
Should You Hire a Pro or Do It Yourself?
This is a crossroads every agent hits. Do you buy a drone and learn to fly, or do you just hire a professional? Going the DIY route can save you some cash, especially if you already have the drone and that all-important Part 107 license. But be warned—there's a steep learning curve to getting those silky-smooth, cinematic shots.
Hiring a professional pilot doesn't just get you a better video; it offloads the risk. A good, insured pilot handles all the compliance, safety, and editing, letting you focus on selling the house.
You can expect to pay a professional pilot somewhere between $200 and $500 for a standard real estate video package. Yes, it’s an upfront cost, but a killer video can make a property feel more premium and attract serious buyers from the get-go. Before you decide to fly it yourself, honestly weigh the cost against your time, the legal headaches, and the final quality of the video.
Creating a Shot List That Tells a Story
A great drone real estate video is more than just a few random flyovers. It’s a story. Sending a drone up to circle a house a couple of times is a huge missed opportunity. You have to think like a filmmaker and build a shot list that creates an emotional connection and answers a buyer's questions before they even think to ask them.
Every single shot needs a purpose. You're not just showing the house; you're selling the lifestyle that comes with it. By planning specific, cinematic movements, you elevate a simple property tour into a narrative that truly resonates with viewers.
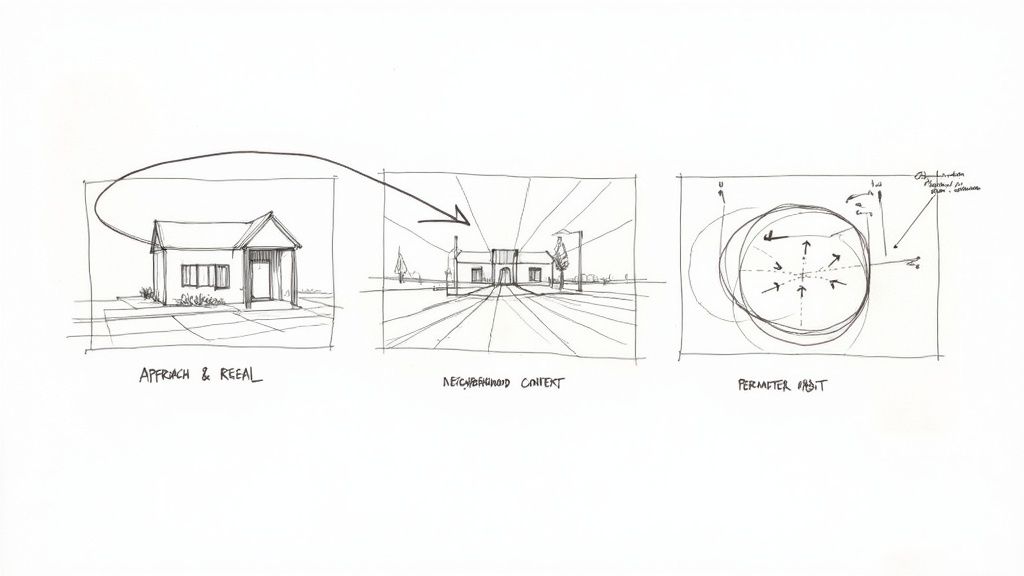
Must-Have Cinematic Drone Shots
To build that powerful narrative, you need a mix of shots that highlight different aspects of the property. Here are the absolute essentials I include in every drone video project.
- The Neighborhood Context Shot: You have to start wide. Get the drone up high and show where the home sits in the bigger picture. Is it near a great park, a top-rated school, the beach, or a cool downtown area? This shot instantly communicates value beyond the four walls of the house.
- The Approach and Reveal: This one is pure movie magic. Start by flying the drone over a treeline or up a long, winding driveway, slowly revealing the front of the home. This builds anticipation and creates a powerful first impression, making the property feel special and inviting.
These two shots lay the groundwork by providing context and building excitement. Once you've nailed these, you can move in closer to focus on the details of the home and the lot itself.
A well-planned shot list is the difference between a video that shows a house and one that sells a home. Each angle should be chosen to highlight a key selling point, from the sprawling backyard to the stunning morning view.
Defining the Property and Its Features
After setting the scene, it’s time to get down to the specifics of the property. The following shots give buyers practical information in a visually engaging way, helping them mentally map out the space.
The Property Perimeter Orbit is a classic for a good reason. A slow, steady orbit around the home clearly defines the property lines, shows off the landscaping, and gives a clean view of the roof’s condition. It’s an honest, 360-degree look that builds buyer confidence.
Finally, the Top-Down View (often called a "bird's-eye view") is invaluable. It’s the perfect way to show the full layout of a backyard, the size of a pool, or the distance between the main house and a guest cottage. This shot acts like a visual map, helping buyers imagine themselves living there. When you mix these aerial views with footage from the ground, you create a complete and compelling tour. You can learn more about how to do that in our guide to real estate video walkthroughs.
Following this strategic approach to your shot list ensures your final video isn't just beautiful—it becomes one of your most effective sales tools.
Getting the Perfect Shot Every Time

You can have the best drone and the perfect flight plan, but if your camera settings are off, the entire video will fall flat. Getting that crisp, cinematic look that makes buyers’ jaws drop starts with dialing in the right settings before you even take off.
For most real estate shots, I stick with 4K resolution at 24fps (frames per second). This combination gives you that professional, movie-like motion blur and incredibly sharp detail, which is exactly what you want when showcasing a beautiful property.
The biggest challenge on bright, sunny days is managing all that light. Direct sunlight can easily wash out important details, making a home's siding or a sparkling pool look like a white blob. To fix this, an ND (Neutral Density) filter is your best friend. It acts like sunglasses for your drone’s camera, letting you use a slower shutter speed without overexposing the shot.
Dialing in Your Camera Settings
Getting your settings right often means making small adjustments based on the weather and time of day. A shot on a bright afternoon will need a completely different approach than one at dusk.
Here’s a quick reference table I use to get started.
Recommended Drone Camera Settings for Real Estate Video
| Shooting Condition | Recommended Resolution | Frame Rate (FPS) | Pro Tip |
|---|---|---|---|
| Bright Sunlight | 4K | 24 | Use an ND8 or ND16 filter to avoid blown-out highlights. |
| Mixed Sun and Clouds | 4K | 30 | Lock your shutter to 1/60 and your white balance to around 5600K for consistency. |
| Overcast or Evening | 2.7K | 30 | You can bump the ISO to 200–400, but try to avoid going over ISO 800 to keep digital noise down. |
You’ll also want to balance your ISO and aperture to get a clean image. For most drones used in real estate, an aperture between f/2.8 and f/4.0 is the sweet spot. And please, always set your white balance manually. Leaving it on auto can cause distracting color shifts as the drone flies from sunny spots to shady ones.
It's All About Timing and Light
You’ve probably heard photographers talk about the "golden hour," and for good reason. That magical window, about 15–30 minutes right after sunrise or just before sunset, casts a soft, warm light that makes any property look incredible. Colors pop, and long shadows add beautiful depth.
Shooting early in the morning has another hidden benefit: the air is cooler and more stable. This means your drone will be less wobbly, giving you much smoother footage.
A few more practical tips for timing your shoot:
- Use an app like Windy to check that wind speeds are below 10 mph. Anything more, and you'll struggle to get steady shots.
- Swing by the property at your planned shoot time a day or two before. This lets you see exactly where harsh shadows fall so you can plan your flight path around them.
- Always keep an eye on the weather forecast. A little rain can cancel a shoot instantly.
“Capturing that fleeting golden hour glow can be a game-changer for property appeal,” shares aerial filmmaker Lena Gomes.
Remember to consider which way the house faces. A west-facing home will be bathed in that gorgeous warm light at sunset, while an east-facing one looks best at sunrise.
Creating Smooth, Stable Flight Paths
Jerky movements and a crooked horizon will instantly make your video look amateurish. The goal is to create smooth, flowing shots that guide the viewer's eye and make them feel like they're floating through the property.
Modern flight planning software can be a lifesaver here. You can map out your entire flight path with waypoints, setting specific altitudes and speeds for each leg of the journey. This takes the guesswork out and lets you focus on the camera.
Here’s a simple flight plan I use for almost every property:
- The Perimeter Shot: Start with a slow, wide circle around the property. This is perfect for showing off the lot size, landscaping, and the condition of the roof.
- The Reveal: Program a path that starts low, perhaps behind a line of trees or a hill, and slowly rises and moves forward to reveal the front of the home. It’s dramatic and builds anticipation.
- The Crane Shot: Position the drone in front of the house and slowly fly straight up. This single shot beautifully showcases the property's layout and its relationship to the neighborhood.
Last spring, I was filming a ranch-style home surrounded by rolling hills. I planned a 180° arc that started behind a cluster of old oak trees. As the drone came around, the house emerged, perfectly lit by the setting sun. Just that one clip helped increase the listing's online views by 45% in the first 24 hours.
One final pro tip: lock your gimbal tilt before you take off. This simple step prevents the camera from drifting and ensures your horizon stays perfectly level, even during complex turns.
When you combine the right camera settings, perfect timing, and a well-planned flight path, you get stunning footage that truly sells a home. And always, always review your clips on a large monitor—you'll spot imperfections you'd miss on a small screen.
Editing And Sharing Your Video To Drive Engagement
Even the most breathtaking aerial footage can lose its impact if you don’t keep the pace lively. A well-timed cut highlights key features without letting viewers’ interest drift.
Fine Tune Edits
Raw drone clips need a little polish to feel professional.
- Trim those wide-angle passes into 5–10 second bites so each shot lands.
- Lift greens and blues, then warm up shadows with a simple LUT or curve tweak.
- Dial background music to around 70% volume—just enough to set the mood.
- Overlay crisp text with the address, square footage, or agent details.
Tasteful fonts and subtle motion bring essential info front and center.
Listings with video content see a jump in engagement and inquiries.
A recent industry survey found that including video drives 118% more engagement and 403% more inquiries compared to listings without it. Learn more on Resimpli’s site.
Format For Every Platform
Each platform has its own sweet spot. Here’s what works best:
| Platform | Format | Ideal Length |
|---|---|---|
| MLS Listing | MP4 H.264 | 30–60 seconds |
| Instagram Reels | Vertical MP4 | 15–30 seconds |
| YouTube | 1080p or 4K | 60–120 seconds |
A standout thumbnail and clear description can double your click-through rate.
- Pick a high-contrast frame that shows off the property’s best angle.
- Add a punchy title overlay like Ocean View Retreat in a bold sans-serif.
- Craft a concise video title featuring the address and a standout feature.
Don’t forget to optimize your real estate drone videos for YouTube to get more views.
For a deeper dive into editing tools and workflows, check out our article Real Estate Video Editor Guide.
Measure Your Results
Publishing isn’t the finish line—it’s the starting gun for data gathering.
Use YouTube and Instagram analytics to watch for drop-off points and total watch time. Compare engagement and inquiries across listings to spot what clicks.
Experiment with two thumbnail styles for the first 24 hours and see which one wins.
Each insight you gather refines your approach, turning good footage into a powerhouse sales tool. Start tracking today and watch your listings shine brighter than ever.
Your Top Questions About Drone Real Estate Videos, Answered
If you're thinking about using drone videos for your listings, you probably have a few questions. It’s a smart move, but you want to be sure you're spending your marketing dollars wisely. Let's break down the common questions I hear from agents all the time about cost, legal stuff, and what actually works.
The first thing everyone wants to know is, "What's this going to cost me?" You might be surprised to learn that hiring a pro isn't as pricey as it sounds. For a typical single-family home, you're usually looking at a range of $200 to $500. That price generally gets you a package deal with both aerial photos and a nicely edited video.
Of course, that's just a ballpark. A huge property with a lot of land is going to take more time and effort to capture than a standard home in a subdivision. If you're after a longer, more dramatic video with high-end editing, the price will go up to match that extra work.
What Factors Influence the Cost?
The final quote you get for a drone shoot will come down to a few key things. Knowing what they are will help you set a realistic budget and understand what you're paying for.
- Property Size and Complexity: A quick fly-over of a simple rectangular lot is one thing. Capturing a massive estate with a pool, guest house, and unique landscaping is a whole different ballgame.
- Video Length and Editing: A simple 60-second clip with clean cuts and some background music is the most affordable option. A 3-minute video that tells a story with professional color correction, text overlays, and custom branding will cost more.
- Location and Airspace: Is the property way out in the country? The pilot will have to account for travel time. More importantly, if it's near an airport or in other restricted airspace, the pilot has to handle getting special FAA clearance, which adds time and complexity to the job.
My best advice? Get a few quotes from different licensed and insured pilots in your area. You'll quickly get a feel for the going rate and find someone who's a good fit for your project and budget.
Do I Need a Special License to Fly a Drone?
This is a big one, and the answer is a hard yes, absolutely. If you're flying a drone for any business reason—and that definitely includes marketing a property for sale—the person flying must have an FAA Part 107 Remote Pilot Certificate.
This isn't just a friendly suggestion; it's the law. Getting caught flying commercially without the right certification can lead to massive fines, both for the pilot and for you, the agent who hired them. The Part 107 license is proof that the pilot knows the rules of the sky, understands weather patterns, and can operate the drone safely.
Hiring a Part 107 certified pilot is non-negotiable. It protects you, your clients, and your brokerage from huge legal and financial risks. It's the only way to guarantee you're getting a true professional.
What Is the Best Length for a Property Video?
It's tempting to want a long, detailed video showing every single thing, but when it comes to online marketing, shorter is almost always better. You have a very small window to grab a potential buyer's attention and make them want to see more.
For most listings, the sweet spot for a drone real estate video is somewhere between 60 and 90 seconds. That’s just enough time to show off the home's best angles, the beautiful yard, the property lines, and how it sits in the neighborhood, all without boring the viewer.
And for social media? Think even shorter. A quick, eye-catching clip for Instagram or Facebook should be closer to 15 to 30 seconds to stop people from scrolling.
Ready to elevate your listings with stunning, AI-powered visuals? Pedra can transform your property photos into breathtaking virtual tours, realistic renders, and engaging videos in just seconds. Join over 20,000 real estate professionals who are selling faster and standing out online. Try Pedra today.

Related Posts
7 Ways AI for Real Estate Is Transforming the Industry in 2026
Explore how AI for real estate is reshaping the market in 2026: valuation, predictive analytics, vir...
Digital Real Estate Agency: A 2026 Guide to Transforming Your Brokerage
Run a digital real estate agency that closes faster: tools, automation, visual presentation and a st...
8 Facebook Marketing Ideas for Real Estate in 2026
Explore our top 8 Facebook marketing ideas for real estate in 2026. This guide covers paid ads, orga...
Real Estate Floor Plans 2026 - Win More Listings
Master real estate floor plans to win listings and engage buyers. Learn to create and use 2D and 3D ...
10 Home Exterior Renovation Ideas to Boost Curb Appeal in 2026
Discover 10 home exterior renovation ideas to boost curb appeal in 2026, from siding and stone accen...
Home Staging Tips: 8 Ways to Sell a Home Faster in 2026
Looking to sell a property faster and for top dollar? These eight essential home staging tips will s...