How to get into real estate photography: Your first steps
Discover how to get into real estate photography with practical steps, gear tips, and shot techniques to land auditions and wow clients.
Breaking into real estate photography really boils down to three things: getting the right gear, nailing a few essential shooting techniques, and figuring out how to land those first clients. Honestly, you can start with a pretty basic kit. Offer to shoot a friend's house for free to build your portfolio, and that's often all it takes to get your first paying gig.
Why Real Estate Photography Is a Smart Career Move
Before we get into camera settings and business cards, let's talk about the opportunity here. Professional photos aren't a "nice-to-have" in real estate anymore—they're an absolute must. Your images don't just make a listing look pretty; they directly affect an agent's success and, ultimately, their wallet.
Think about it: high-quality photography is a serious sales tool. It grabs the attention of qualified buyers, gets properties off the market faster, and can even lead to higher sale prices. This changes your role from just a vendor to a crucial partner in an agent's business.
The Tangible Value You Bring
That first impression online is everything. In a sea of listings, your photos are what stop the scroll and make a potential buyer click. Understanding the power you hold is the first step to building a confident, profitable business.
Smart agents know that investing in great photos pays for itself. When you deliver consistently stunning images, you're doing more than just taking pictures. You're helping them build their brand, close deals quicker, and boost their commissions. That's why they're willing to pay for a skilled photographer they can rely on.
Your camera is more than just a tool to take pictures; it's a tool to solve a major problem for real estate agents: getting more eyes on their listings and selling homes faster.
At its core, this business is built on trust and results. As you learn the ropes of real estate photography, always remember that your real job is to become an indispensable part of the sales process.
The Edge Good Photos Give an Agent
Buyers shop with their eyes, and almost every property search now starts online. Crisp, well-lit photos are what stop the scroll, earn the click, and bring more qualified buyers through the door. Add modern touches like aerial drone shots or a quick video walkthrough and a listing stands out even more in a crowded feed.
If you want to sharpen your eye before you ever take a paid job, our real estate photography tips walk through the composition and lighting habits that separate amateur snapshots from listing-ready images.
Putting Together Your First Real Estate Photography Kit
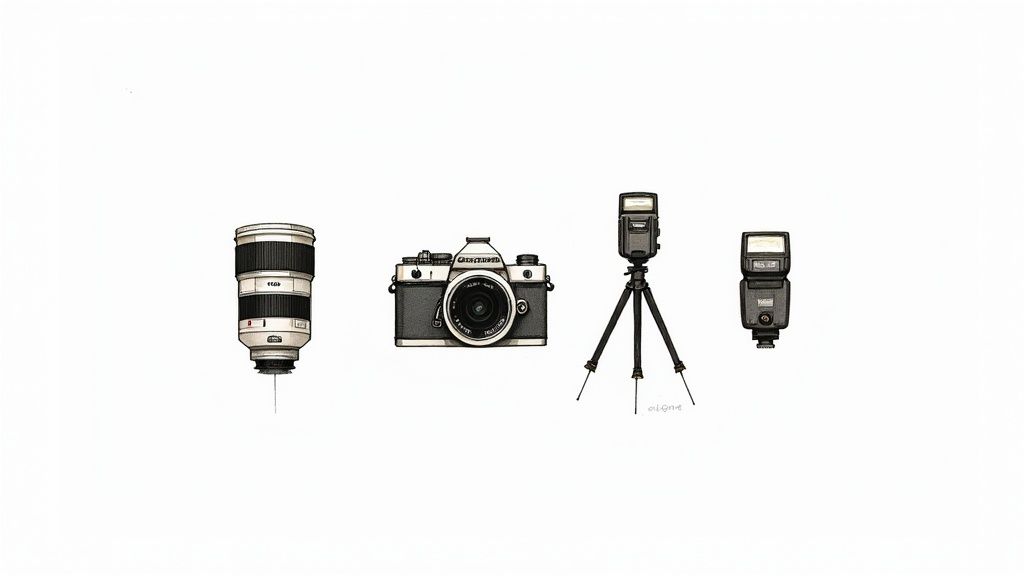
Let’s get one thing straight: you don't need a truckload of expensive gear to get started in real estate photography. The goal here is to build a reliable, professional toolkit that gets the job done right from day one. We're talking smart investments, not gear obsession.
Your core setup is actually pretty simple. You need a camera that gives you full manual control, a specific type of lens to make rooms feel spacious, a solid tripod to keep your shots sharp, and a basic flash to deal with tricky lighting. That’s it. That’s the foundation of a pro kit.
The Camera and Lens: Your 1-2 Punch
The camera body is important, but honestly, the lens is the real MVP in this business. You'll need a camera with a full-frame or APS-C (crop) sensor that lets you swap out lenses and control every setting yourself. This is an absolute must-have for professional results.
What's even more crucial is your choice of a wide-angle lens. This is the tool that lets you capture an entire room without making it look distorted, creating an open and welcoming feel in your photos. The industry standard is a lens in the 16-35mm range for a full-frame camera (or around 10-24mm for a crop sensor). It's the sweet spot—wide enough to be effective but not so wide that you get that bizarre "fisheye" effect.
If you're looking for specific recommendations, we've broken down some of the best options in our guide on choosing a camera for real estate photography.
Why Your Tripod and Flash Are Non-Negotiable
A sturdy tripod might just be the most important piece of gear you own. It’s not just about preventing blurry photos; it’s about consistency. A tripod locks your camera in place, ensuring every shot is perfectly level and allowing you to use slower shutter speeds in dark rooms without any camera shake.
A tripod isn't just an accessory; it's a foundational tool. It forces you to slow down and compose your shots thoughtfully. More importantly, it guarantees your vertical lines are straight—the number one sign of a pro real estate photo.
Next up, lighting. While we all love beautiful natural light, you’ll constantly run into rooms with dark corners or uneven shadows. A simple off-camera speedlight (or flash) is all you need to start. You can bounce the light off a ceiling or wall to softly fill in those shadows, creating a bright, clean look that still feels completely natural.
To help you get started, here’s a quick-glance table of the essential gear you'll need.
Essential Gear for New Real Estate Photographers
| Gear Category | What You Need | Why It's Important | Budget-Friendly Option |
|---|---|---|---|
| Camera Body | DSLR or Mirrorless with manual mode | Gives you full creative control over exposure and focus. | Used Canon EOS Rebel or Nikon D3500 series. |
| Lens | Wide-angle lens (10-24mm for crop, 16-35mm for full-frame) | Captures the entire room, making spaces feel larger. | Tokina 11-16mm f/2.8 or Samyang 14mm f/2.8. |
| Tripod | A sturdy tripod with a ball head or 3-way head | Ensures sharp images, straight lines, and consistent angles. | K&F Concept or Neewer aluminum tripods. |
| Lighting | One off-camera speedlight/flash | Fills in shadows for bright, evenly lit interiors. | Godox TT600 or Yongnuo YN560 IV. |
This lean setup is more than enough to produce high-quality images that will impress your first clients.
Your Go-To Camera Settings
Having the right gear is just the first step. Knowing how to dial in your settings is what really makes the magic happen. Your goal is simple: capture images that are sharp from front to back, perfectly lit, and free of distracting digital noise.
Start with these settings as your baseline for almost every interior shot:
- Shooting Mode: Always shoot in Manual (M). This puts you in the driver's seat, ensuring your brightness is consistent from one photo to the next.
- Aperture: Set your aperture somewhere between f/8 and f/11. This range gives you a deep depth of field, which means everything from the table in the foreground to the window in the background will be tack sharp.
- ISO: Keep your ISO as low as it can go—usually ISO 100 or 200. A low ISO minimizes that grainy digital noise, resulting in super clean, high-quality photos. Since you're on a tripod, you can use a slower shutter speed to let in more light without worrying about blur.
- Focus: Switch to manual focus and use your camera's live view screen. Zoom in on something in the middle of the room to absolutely nail the focus every single time.
Mastering these core settings creates a reliable workflow for every shoot. That consistency not only makes your editing life easier but also builds a professional, polished style that real estate agents will come back for again and again.
Your On-Site Game Plan for Every Photoshoot
The best photographers don’t just show up and start clicking. They walk in with a clear, repeatable plan that guarantees they get the job done efficiently and consistently, every single time. This is your playbook for a smooth shoot, from the prep work that happens days before to the final click of the shutter.
Honestly, your success starts long before you even touch your camera. The single biggest factor in getting amazing photos is the condition of the home itself. A cluttered, messy space is always going to look cluttered and messy, no matter how great your gear is.
That’s why your first job is to help the agent and homeowner get the property ready.
Pre-Shoot Prep: The Homeowner Checklist
I can't stress this enough: create a simple, one-page PDF checklist and email it to the agent the moment they book you. This little document is a game-changer. It sets clear expectations and gives the agent a tool to help their clients prep the house. It's a professional touch that saves you massive headaches on shoot day.
Keep your checklist simple and to the point. Here’s what it should cover:
- General Decluttering: Clear all kitchen and bathroom countertops. Take the magnets off the fridge, hide the pet bowls, and stash the toys.
- A Good Cleaning: Make sure all surfaces are wiped down, floors are clean, and windows are spotless. You'd be amazed how much dust high-resolution photos can pick up.
- Depersonalize the Space: Take down family photos, hide stacks of mail, and tuck away most of the knick-knacks. The goal is to let buyers imagine themselves living there.
- Let There Be Light: Check and replace every single burnt-out light bulb. Just before you arrive, they should turn on every light in the house—lamps, under-cabinet lighting, the works.
- Curb Appeal: Hide the trash cans and garden hoses. Mow the lawn and, most importantly, move all cars out of the driveway and from the street in front of the house.
If you really want to understand the power of a well-prepped home, just look at some dramatic virtual home staging before and after transformations. The difference is night and day.
Structuring Your Photoshoot
Once you arrive at a perfectly prepped home, it’s all about working smart. I always have a methodical workflow. My go-to strategy is to start with the exterior, especially if the morning or afternoon light is just right. Then, I head inside and move through the property in a logical path.
I’ll begin with the front exterior to get that crucial "money shot"—the one that will be the main thumbnail on Zillow. After that, I’ll hit the backyard to capture the deck, pool, or garden. If the sun is super harsh, I might save the exterior shots for the end of the session when the light is softer.
Inside, I start right at the front door and walk through the house just like a potential buyer would. That usually means entryway, living room, dining room, and kitchen first. Then I’ll move on to the primary bedroom and bathroom, followed by the other bedrooms, bathrooms, and any bonus rooms.
A systematic approach keeps you from forgetting rooms or missing important angles. It turns what could be a chaotic mess into a calm, controlled process, freeing you up to focus on what matters: great composition and lighting.
Creating a Comprehensive Shot List
For every room, your mission is to tell its story. You need to show off its size, its best features, and how it connects to the rest of the home. I stick to a simple but effective shot list for almost every room.
- The Wide Shot: I'll stand in a corner or doorway to get the widest possible view of the space. This is the main establishing shot.
- The Opposite Angle: Next, I’ll move to the opposite corner and shoot back toward where I just was. This gives a full perspective of the room.
- The Feature Shot: I then zoom in a bit to capture the room's main selling point—a gorgeous fireplace, a big kitchen island, or a window with a killer view.
- The Detail Shot: If there are unique, high-end finishes like custom tile, a Sub-Zero fridge, or cool hardware, I’ll grab a close-up.
This four-shot method gives agents everything they need for the listing. For a deeper dive into framing and composition, check out our complete guide on how to take real estate photos.
Essential On-Site Techniques
As you work through your shot list, there are two technical details that are absolutely non-negotiable for professional results: bracketing your exposures and keeping your verticals straight.
Bracketing just means taking multiple photos of the same scene at different brightness levels—I usually take one dark, one medium, and one bright. This technique is a lifesaver in rooms with bright windows and dark interiors. In editing, you’ll blend these shots into one perfectly lit image where you can see the details both inside and out.
Finally, pay obsessive attention to your lines. Use your camera's level or grid display to make sure all vertical lines—walls, doorways, windows—are perfectly straight up and down, not leaning. This tiny detail is often the biggest giveaway between an amateur and a pro. It gives the photos a sense of stability and polish that makes the whole gallery look incredible.
Nailing the Edit and Delivery: Your Post-Shoot Workflow
The shoot might be over, but your job is far from done. In many ways, the real work begins back at your computer. This is where you transform solid captures into the kind of stunning, polished images that make a listing pop off the screen.
In the fast-paced world of real estate, speed is everything. Agents are always on a tight deadline, so building a repeatable, efficient workflow is non-negotiable. Being the photographer who can deliver amazing photos within 24 hours will make you an indispensable partner, not just another vendor.
First Pass: Culling and Basic Adjustments
After a shoot, you’ll be staring at a mountain of photos, especially if you're bracketing your shots. The first order of business is to cull them. Don't get bogged down; your goal is to quickly sift through everything and pick the winning compositions. I use Adobe Lightroom for this, quickly flagging or rating my top choices to narrow down the gallery.
Once you’ve got your "hero" shots, it's time for the foundational edits. This isn't about making dramatic changes just yet. It's about setting a clean, professional baseline for every photo.
Here’s my initial checklist for every image:
- Lens Corrections: The first thing I do is apply the lens profile correction. It instantly fixes the distortion and vignetting common with wide-angle lenses.
- Straighten Verticals: Crooked lines scream "amateur." Use the Transform tool to make sure every wall, window frame, and doorway is perfectly straight. This is a must.
- White Balance: I find a neutral white or gray point in the room to correct the white balance. You want whites to be pure white and all the colors to look natural, not tinged with yellow or blue.
- Exposure Bumps: Just a few minor tweaks to brightness and contrast can create a much better starting point before you dive into the heavy lifting.
The Magic Happens Here: Advanced Editing Techniques
With the basics squared away, it’s time to create those bright, crisp, and evenly lit images that agents and buyers love. The two most popular methods for achieving this look are HDR blending and the "Flambient" technique.
High Dynamic Range (HDR) Blending This is the process of merging your bracketed shots (the dark, medium, and bright versions) into one. The result is a single photo that holds all the detail—you can see the view out the bright window and the details in the darker corners of the room at the same time.
The "Flambient" Method This is a slightly more hands-on approach that I personally love. It involves blending a flash exposure with an ambient, natural light exposure. The ambient shot provides the natural feel and mood, while the flash shot gives you clean, color-accurate light. When you combine them, you get the best of both worlds: an image that looks vibrant and true-to-life but still feels completely natural.
A successful shoot is built on a solid, methodical plan, ensuring you cover every angle and don't miss a single detail.
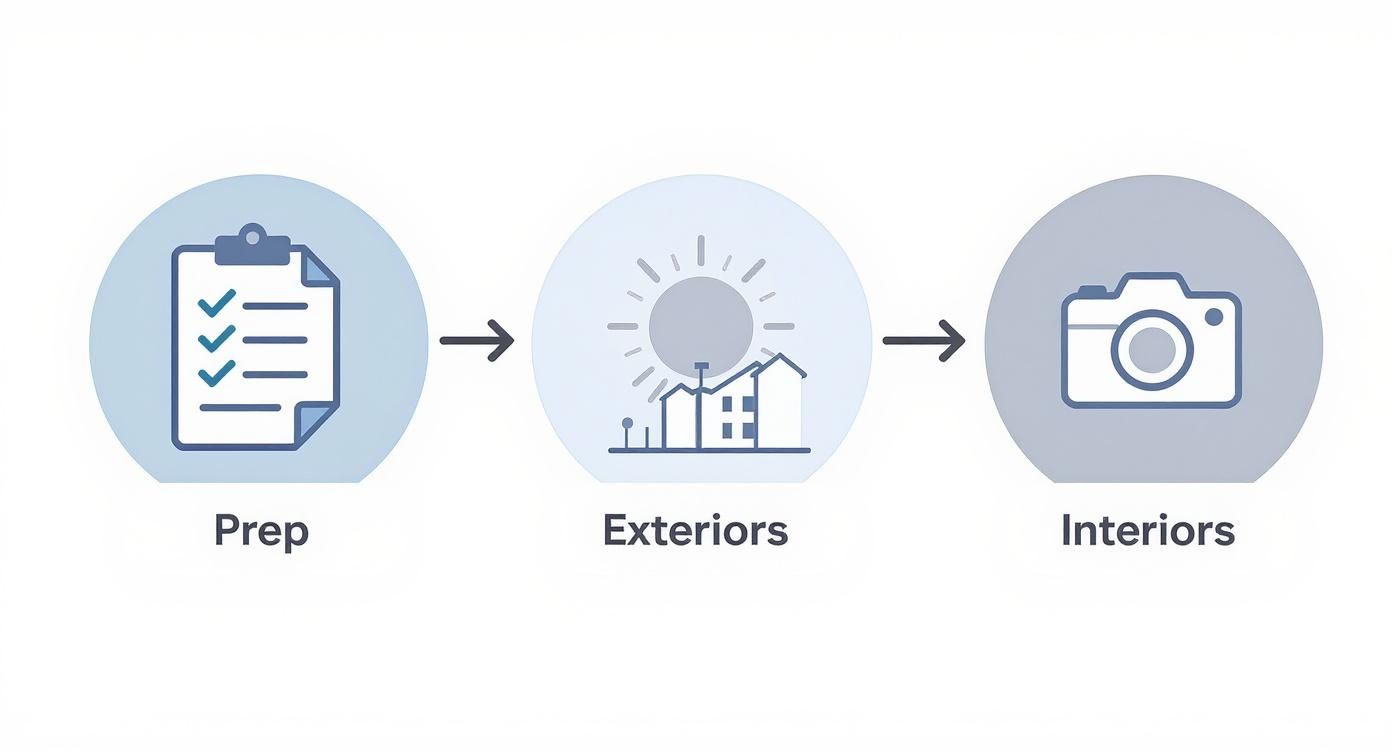
This workflow shows how preparation flows into a systematic process for shooting both the exterior and interior, ensuring comprehensive coverage every time.
The Final Polish: From Good to Great
The last 10% of your editing time is what separates the pros from the pack. This is where you sweat the small stuff that makes a huge difference.
- Sky Replacements: If you shot on an overcast day, a dreary gray sky can kill a great exterior shot. Swapping it for a bright blue sky is a simple fix that adds instant curb appeal.
- Removing Distractions: This is huge. I always scan for and remove things like stray power cords, ugly outlet covers on a beautiful backsplash, or brown spots on the lawn.
- Color Correction: Do one last check to make sure the colors are consistent from photo to photo. The paint color in the living room should look the same no matter which corner you shot it from.
The right tools make all this possible. For a deeper look at what the pros are using, from Lightroom presets to AI-powered editors, we put together a guide on the best real estate photography editing software.
Speed and consistency are your currency in this business. A streamlined editing workflow doesn't just make your life easier; it builds a reputation for reliability that agents will pay a premium for.
Delivering the Goods
When your images are finally ready, how you deliver them matters. Please, never just email a zip file of JPEGs. It feels unprofessional and can be a pain for your client to download and manage.
Use a dedicated online gallery service like Pixieset, ShootProof, or Aryeo. These platforms let you present the photos in a beautiful, branded gallery. Clients can easily view, download, and share their favorites. It also makes it simple to provide different sizes—high-resolution files for print brochures and web-optimized versions for the MLS.
Your target should always be a 24-hour turnaround. It’s the industry standard, and frankly, it’s a massive selling point. When you deliver a perfect gallery the next day, you’re not just a photographer; you’re a problem-solver helping your client get their listing live, faster.
How to Price Your Work and Find Your First Clients
Alright, this is where the rubber meets the road—turning your photography skills into an actual business. Figuring out what to charge and how to land those first few clients can feel a little intimidating, but it’s more straightforward than you think.
You don't need some massive, complicated business plan. You just need to understand your value, have a solid pricing structure, and know how to get in front of the right people.
Setting Your Rates with Confidence
There’s no magic number for pricing, but most pros in this business stick to one of three main models. Let's break them down so you can see what feels right for you and your local market.
-
Per Photo: This one is as simple as it sounds. An agent pays a set price, say $10-$25, for each photo they want. It’s easy for everyone to understand, but it can cap your earnings, especially on larger homes where you're delivering a lot of images.
-
By Square Footage: This is a really common and fair way to price your work. You create different price tiers based on the home's size (e.g., under 2,000 sq. ft., 2,000-3,500 sq. ft.). This way, your effort and pay scale with the size of the job.
-
Packaged Services: This is where the real money is. You bundle your services into different packages. Your basic package might just be 25 high-quality photos. But a premium package could include those photos plus drone shots, a virtual tour, and a guaranteed 24-hour turnaround.
Your experience level obviously plays a big role here, too. When you're brand new, you might start in the $110-$170 range for a standard shoot. Once you've got some projects under your belt and a portfolio to show for it, you can easily command $230-$300 or more.
Never try to be the cheapest photographer in town. Compete on quality, reliability, and service. Agents will gladly pay more for someone who makes their job easier and delivers incredible results every single time.
Remember to factor in your own costs—your gear, software subscriptions, insurance, and your time spent on-site and editing. A great first step is to do a little recon. See what other photographers in your city are charging. This gives you a realistic baseline so you can price yourself competitively without selling yourself short.
Building a Portfolio from Scratch
I hear it all the time: "How do I get clients without a portfolio?" It’s the classic chicken-or-egg problem, but the fix is simple—go create your own experience. You can't just wait for the phone to ring.
The easiest way to get started is by shooting for free, but you have to be smart about it.
-
Shoot for Friends or Family: Got a friend or relative with a nice-looking, well-lit home? Ask if you can photograph it. Treat it like a real gig. Give them tips on staging, be meticulous with your shots, edit them professionally, and deliver a full gallery.
-
The "Fixer-Upper" Strategy: This is a killer move. Hop on Zillow and look for listings with truly terrible photos—you know the ones, dark, blurry, crooked phone pics. Find the agent's contact info and send them a simple, direct offer: "I saw your listing and I'd love to help it stand out. I'll reshoot the exterior and a few key rooms for you, completely free, just to show you what I can do."
This does two powerful things. First, you get legitimate, market-ready photos for your portfolio. Second, you’re showing your value directly to a potential client, which often turns into your first paid job right then and there.
Finding and Connecting with Your First Clients
Once you have a small but impressive portfolio, you're ready to get paid. Your entire world now revolves around real estate agents. The goal is to meet them where they already hang out.
Networking is your best friend. Start showing up at local real estate meetups or even just pop into a few open houses. Don't walk in with a sales pitch. Just be a human. Introduce yourself, ask agents about their business, and find out what their biggest pain points are with photography.
Then, it's time for some simple, direct outreach.
Simple Email Template
Subject: Professional Photography for Your [City Name] Listings
Hi [Agent Name],
My name is [Your Name], and I'm a real estate photographer here in [City Name]. I came across your beautiful listing at [Address] and wanted to reach out. I specialize in creating bright, crisp photos that help agents sell properties faster.
You can see some of my recent work here: [Link to Your Portfolio]
If you have any listings coming up, I'd love to offer you 20% off your first shoot to try out my services.
Thanks, [Your Name] [Your Phone Number]
This kind of direct approach, paired with a solid portfolio and a good introductory offer, is often all it takes to land those first few clients. Remember, you're providing a service that delivers real financial value: photos that help an agent sell faster and market a higher-value listing. For a step-by-step plan on turning outreach into a steady pipeline, see our guide on how to get real estate photography clients.
Answering Your Top Questions
Getting started in any new field means you're going to have questions. It's only natural. When you're just learning how to break into real estate photography, a few of the same concerns always seem to pop up. Let's tackle them head-on so you can move forward with confidence.
Lots of newcomers worry they can't compete unless they offer every single service right out of the gate. The truth is, you shouldn't. The smart move is to nail the fundamentals first, then add more services as you build your skills, your client base, and your bank account.
Do I Really Need a Drone Right Away?
Not for your very first shoot, no. But you should have a plan to get one, and soon. You can absolutely build a solid foundation with high-quality interior and exterior photos, but let's be real—aerial shots are becoming standard practice for a lot of agents. A drone gives a perspective of the property, its layout, and its place in the neighborhood that you just can't capture from the ground.
Listings with aerial photos tend to sell faster, which makes drone work a super easy and valuable upsell for you. My advice has always been the same: get really good on the ground first. Once you start making some money, reinvest it into getting your drone license (like the FAA Part 107 in the US) and a good, reliable drone. It’s easily the best way to level up your services and boost your income.
How Can I Build a Portfolio When I Have No Clients?
You have to get out there and create your own opportunities. The simplest way to start? Photograph your own home, or ask friends and family if you can shoot theirs. Don't just snap a few pictures—treat it like a real gig. Advise them on how to stage the space, shoot every room like a pro, and deliver a full gallery of beautifully edited photos. This is how you practice and get your first portfolio pieces.
Here's a pro tip that works wonders: Find a live listing online that has truly terrible photos. Reach out to the agent, introduce yourself, and offer a free reshoot of the exterior and a couple of the main interior rooms.
It’s a win-win. The agent gets better photos at zero risk, and you get high-quality, market-ready images for your portfolio. This kind of hustle shows agents you’re serious and is exactly how many of us landed our first paying client after a free shoot.
What's the Deal with Insurance and Contracts?
This is non-negotiable. Trying to run a business without legal and financial protection is a recipe for disaster. Your first move should be setting up a business entity, like an LLC, to protect your personal assets if something goes wrong. Think of it as the foundation of your business.
Next, you need a solid contract for every single job. I don't care if it's for your best friend's cousin—use a contract. It needs to lay out exactly what you'll deliver, the turnaround time, how you'll get paid, and the big one: image licensing. You are the copyright holder of your photos. The agent is simply licensing them from you for the specific purpose of marketing that one property.
Finally, get liability insurance before you step foot on your first property. It covers you if you accidentally knock over a priceless vase or scratch a hardwood floor. Many top-producing agents and larger brokerages won't even talk to you unless you can show proof of insurance, so it’s essential for playing in the big leagues.
Ready to deliver jaw-dropping photos without spending hours editing? With Pedra, you can use AI to enhance your images, virtually stage rooms, and create listing-ready shots in minutes, so you can elevate your work and impress clients from day one.

Related Posts
Listing Presentation Templates: Win More Clients
Professional listing presentation templates that close deals. Customizable CMA templates, market ana...
Win More Deals with Your Real Estate Listing Presentation
Master your real estate listing presentation to attract clients and close more deals. Learn expert t...
7 Ways AI for Real Estate Is Transforming the Industry in 2026
Explore how AI for real estate is reshaping the market in 2026: valuation, predictive analytics, vir...
Digital Real Estate Agency: A 2026 Guide to Transforming Your Brokerage
Run a digital real estate agency that closes faster: tools, automation, visual presentation and a st...
8 Facebook Marketing Ideas for Real Estate in 2026
Explore our top 8 Facebook marketing ideas for real estate in 2026. This guide covers paid ads, orga...
Real Estate Floor Plans 2026 - Win More Listings
Master real estate floor plans to win listings and engage buyers. Learn to create and use 2D and 3D ...