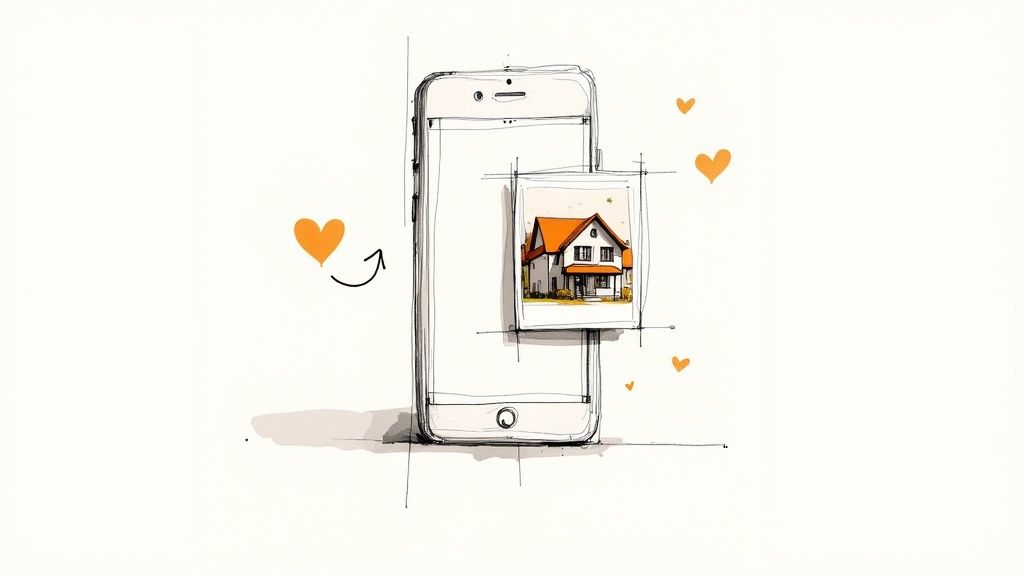
Mastering Interior Real Estate Photography
Discover how professional interior real estate photography can sell properties faster. Our guide covers staging, lighting, gear, and post-processing.
Interior real estate photography is all about capturing a home's indoor spaces in a way that makes potential buyers fall in love. It’s far more than just pointing a camera and clicking; it’s a specific craft that uses professional techniques to create images that spark interest and drive faster, more profitable sales.
Why Great Photos Are Your Best Sales Tool
Let's be honest: in real estate today, the first showing almost always happens online. Your listing photos are essentially a dating profile for the house. You need compelling images that make buyers stop scrolling and say, "I have to see this place."
High-quality photography doesn't just show a room; it sells a lifestyle and forges an instant emotional connection.
When a buyer can truly picture themselves cooking in that kitchen or unwinding in that living room, they go from being a casual browser to a serious prospect. Your photos are what build that bridge.
The Tangible Impact of Professional Images
The difference between a quick phone snapshot and a professional photograph isn't just about looks—it’s about money. Time and time again, listings with high-quality images outperform the competition across every important metric. This isn’t just a gut feeling; the data clearly shows a direct line between image quality and sales success.
Think about it. Professional photos make a property pop in a crowded market. They attract more eyeballs and send a clear signal to buyers: this is a premium listing. That perception often translates directly into real-world value.
To put it in perspective, let's look at a side-by-side comparison.
The Impact of Professional vs Amateur Photography
| Metric | With Professional Photography | With Amateur Photography |
|---|---|---|
| Buyer Engagement | Higher click-through rates, more saved listings | Often gets overlooked, lower engagement |
| Perceived Value | Property appears more valuable and well-maintained | Can devalue the property, looks cheap |
| Time on Market | Sells significantly faster | Tends to sit on the market longer |
| Final Sale Price | Often sells at or above asking price | More likely to receive lowball offers |
The takeaway is simple: investing in quality photography isn't just a "nice-to-have"; it's a strategic move that directly influences your bottom line.
A great photograph is a full-page ad for your property. It's the most powerful tool you have to capture a buyer's attention before they ever step foot through the door. It sets the tone for the entire sales process.
Driving Faster Sales and Higher Offers
The money you put into professional photos almost always pays for itself, often many times over. Homes showcased with high-quality images have been shown to sell around 32% faster than those with amateur shots.
Even better, these properties can fetch between $3,000 and $11,000 more at closing. With up to 95% of buyers more likely to show interest in the first place, the advantage is undeniable. This turns photography from a simple expense into a high-return investment.
Better images lead to more clicks, more showings, and ultimately, a quicker sale at a better price. The first impression from a stunning photo can make all the difference, and a powerful real estate listing cover photo is your first—and best—opportunity to make that impression count.
Setting the Stage for a Perfect Shot
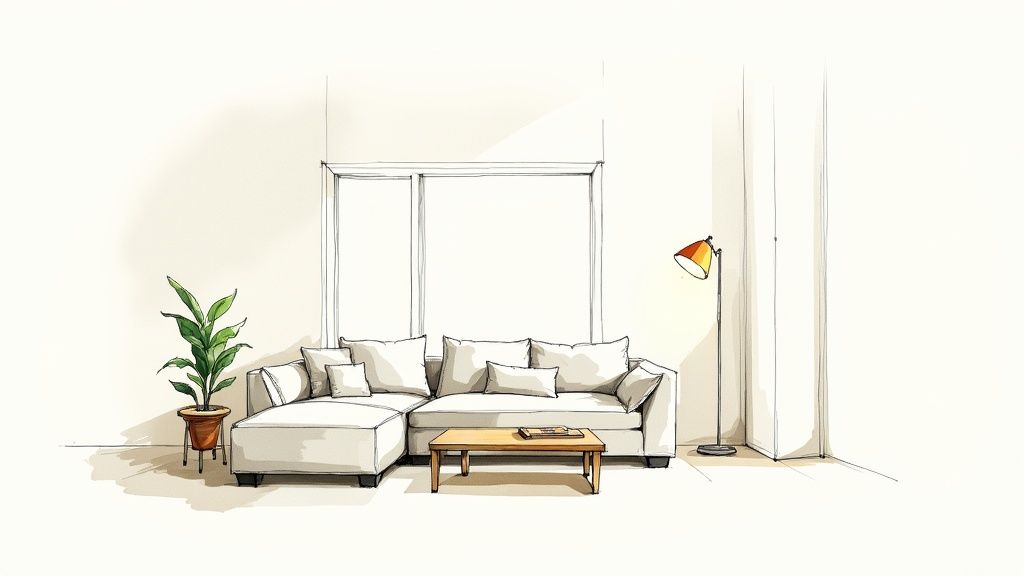
Great real estate photos don’t just happen. They’re crafted, and that process starts long before a camera ever enters the room. Think of it like a movie set—every piece of furniture, every lamp, and every angle is deliberately chosen to tell a story. Your job is to set a scene that feels less like a house and more like a future home.
This prep work is all about taking control of the environment to make the property shine. It really boils down to two critical pieces: strategic staging and mastering the light. Get these right, and you've created the perfect canvas for images that will stop scrollers in their tracks.
Creating a Buyer-Ready Environment
Staging isn't about hiding a home's flaws; it's about revealing its full potential. The goal is to help buyers easily picture themselves living there, which means striking a careful balance—it should feel warm and lived-in, but not like it belongs to someone else.
The quickest way to make a big impact? Declutter. Removing extra stuff instantly makes a room feel bigger and more open.
- Clear the countertops. In the kitchen and bathrooms, take everything off the counters except for maybe a simple bowl of fruit or a nice soap dispenser.
- Take down personal items. Family photos, kids' drawings, and refrigerator magnets need to go. This simple step helps buyers imagine their own family in the space.
- Tidy up surfaces. Straighten up bookshelves and coffee tables so they look neat and styled, not just messy.
Making the space less personal is just as important. You want buyers to fall in love with the house, not get distracted by the current owner's life.
"Staging is the art of creating a mood. It's not about decorating or personal taste. It’s about making a house look bigger, brighter, cleaner, warmer, and, most of all, loved."
By simplifying the decor, you let the home’s best features—like its beautiful floors or high ceilings—become the main event. That’s exactly what your camera is there to capture.
Using Light to Your Advantage
In photography, light is everything. The way you handle it can make a room look bright and expensive or dark and cramped. The trick is to blend natural light with the home's existing lights to create a balanced, professional look.
To get the most out of that beautiful sunshine, your windows have to be spotless. It's a small detail that makes a huge difference. Learning how to clean inside windows for a streak-free shine ensures every ray of light comes through clearly without being dulled by smudges.
Working with Natural Light
Nothing beats natural light. It gives photos a soft, genuine quality that's almost impossible to fake. The key is timing your shoot correctly.
- Scout the Property: Swing by the house at different times of day. See when the sun hits the most important rooms, like the kitchen and living area.
- Look for Bright, Indirect Light: An overcast day is actually a photographer's best friend. The clouds act like a giant, soft filter, spreading the light evenly and killing harsh shadows.
- Open Everything Up: Before you start shooting, pull back every curtain, raise every blind, and open all the interior doors. You want light to flood the space and flow from room to room.
Supplementing with Artificial Light
Even on a bright day, natural light often needs a little help. Using artificial light strategically fills in dark corners and makes sure the entire room is perfectly lit.
Start by turning on every light in the house—lamps, overhead fixtures, you name it. This creates an instantly warm and inviting vibe. Just be careful about mixing light temperatures (like warm yellow light from a lamp and cool blue daylight from a window), as it can look strange in photos. Pros often bring in their own flashes to create a clean, consistent light that makes every detail look its absolute best.
Choosing Your Gear and Camera Settings
Jumping into photography gear can feel like you're trying to learn a whole new language. But here's the good news: you don't need a truckload of expensive equipment to create incredible interior photos. You just need the right tools for the job.
Think of it like this: a great chef really just needs one perfectly sharp knife. For real estate photography, your "sharp knife" is a solid camera, a wide-angle lens, and a sturdy tripod. These three pieces are the workhorses that will let you capture any room in its best light.
The Essential Photography Toolkit
While a fancy camera is nice to have, the lens you choose has a much bigger impact on your final images. For shooting interiors, a wide-angle lens isn't just a suggestion—it's non-negotiable. It’s what lets you capture the full scope of a room, making it feel open and spacious instead of cramped.
A tripod is just as critical. It holds your camera perfectly still, which is the secret to getting those tack-sharp, crystal-clear photos that make buyers stop scrolling. Trying to hand-hold the camera, especially when the light is low, almost always introduces a subtle blur that instantly makes a photo look amateurish.
Here are the absolute must-haves:
- A DSLR or Mirrorless Camera: These cameras give you full manual control, which is essential for adapting to the tricky lighting you'll find inside a home.
- A Wide-Angle Lens: A lens in the 16-24mm range (on a full-frame camera) is the sweet spot. It pulls in the entire room without making the walls look weirdly distorted.
- A Sturdy Tripod: This is your best friend. It kills camera shake, which lets you use a slower shutter speed to soak up more light for brighter, cleaner images.
A tripod isn't just an accessory; it's a foundational tool. It forces you to slow down, compose your shot thoughtfully, and ensures every image is perfectly crisp. It’s the single easiest way to elevate your photos from amateur to professional.
With these three items, you're ready to handle just about any interior shoot that comes your way. If you want a deeper dive into specific models, our dedicated guide on the best camera for real estate photography has you covered.
Demystifying Key Camera Settings
Once your gear is set up, it's time to dial in the settings. This is where you really take control. The "exposure triangle"—aperture, ISO, and shutter speed—is just a fancy term for the three settings that work together to control how bright and clear your photos are. Nailing this balance is the secret sauce.
Let's break them down into plain English.
Aperture (f-stop)
Think of aperture as the pupil of your camera's eye. A wide-open pupil (a low f-number like f/2.8) lets in a ton of light but creates that blurry background effect you see in portraits. For real estate, we want the exact opposite.
You need everything from the couch in the foreground to the window in the back to be perfectly sharp. To do that, you need a narrow aperture, which means setting your camera somewhere between f/8 and f/11. This gives you a deep "depth of field," keeping the whole room in focus.
ISO
ISO is simply how sensitive your camera's sensor is to light. A low ISO (like 100 or 200) is less sensitive, which gives you incredibly clean, high-quality images with zero graininess. A high ISO makes the sensor more sensitive—great for dark situations, but it comes with a price: ugly digital "noise" that looks like grain.
For interior real estate photography, your rule of thumb is to always use the lowest ISO possible. Because you're using a tripod, you can let the camera take its time to gather light with a slow shutter speed. There's no need to crank up the ISO and ruin your image quality. This one is non-negotiable.
Shutter Speed
This one's easy: shutter speed is just how long the camera's shutter stays open to let light hit the sensor. A fast shutter speed (like 1/1000s) freezes action. A slow shutter speed (like 1/2s) lets in a lot more light, which is exactly what we need for still interior scenes.
Since your tripod is doing the steadying work and your ISO is low, your shutter speed will often be quite slow. You'll just adjust it from shot to shot until your camera's light meter tells you the exposure is balanced. Don't be afraid to use speeds of a full second or even longer—the tripod guarantees a perfectly sharp shot.
A Room-By-Room Shooting Workflow
Once your gear is set, it’s all about having a system. Walking into a property without a plan is a recipe for missed shots and wasted time. The best pros have a repeatable workflow that lets them move through any home with confidence, ensuring every key feature is captured perfectly.
Think of yourself as a storyteller. Your photos need to take a potential buyer on a virtual journey, showing them how one space flows into the next. That means you need a logical starting point—usually the front door—and a clear path through the home.
Mastering Composition and Flow
Before you even think about hitting the shutter button, your first task is finding the money shot for each room. The right angle can make a cramped space feel airy or a standard room look spectacular. Thankfully, you don't need a hundred different tricks; two foundational techniques will get you 90% of the way there.
First, shoot from the corners. By setting up your tripod in a corner and aiming across the room, you instantly maximize the sense of space. It’s the oldest trick in the book for a reason—it works, making rooms feel bigger and giving buyers a clear view of the layout.
Second, use doorways as natural frames. Standing just outside a room and shooting through the doorway adds a layer of depth and feels like an invitation. This is a great way to show how spaces connect, like capturing the living room as seen from the entryway.
Every photo you take should answer a buyer's silent questions: How big is it? What’s the view? Where does that door lead? Your composition is the key to answering those questions visually.
The Essential Shot List for Every Home
Every house is different, but a basic shot list is non-negotiable. It’s your safety net, making sure you don’t get back to the office only to realize you forgot to shoot the master bath.
- Living Room: Start with a wide shot from one corner, then get another from the opposite corner for full coverage. After that, zoom in on the details that sell—the fireplace, custom built-ins, or that huge picture window.
- Kitchen: This room can make or break a sale, so give it extra attention. Get a wide shot to show the whole layout. Then, grab detailed shots of the appliances, countertops, sink, and any special features like a breakfast bar or pantry.
- Bedrooms: For the primary bedroom, you’ll want at least two wide angles. Make sure to highlight perks like walk-in closets or the entrance to the en-suite bathroom. For the other bedrooms, one solid corner shot usually does the trick.
- Bathrooms: These small spaces are tough. Shooting from the doorway is almost always your best bet to make it feel as open as possible. Get a clean shot of the vanity, the shower, and any unique tile work.
Capturing Perfect Light with Bracketing
You’ve staged everything perfectly, but now you’re facing that classic problem: a dark room with a blazing bright window. Expose for the room, and the window is a wall of white. Expose for the view, and the room turns into a cave. The professional solution is bracketing.
It sounds technical, but it’s simple. You just take three or more photos of the same scene without moving the camera: one dark, one just right, and one bright. Later, you’ll blend these exposures together in software to create one flawless image where you can see every detail inside the room and the beautiful view outside.
This infographic gives you a great starting point for your camera settings.
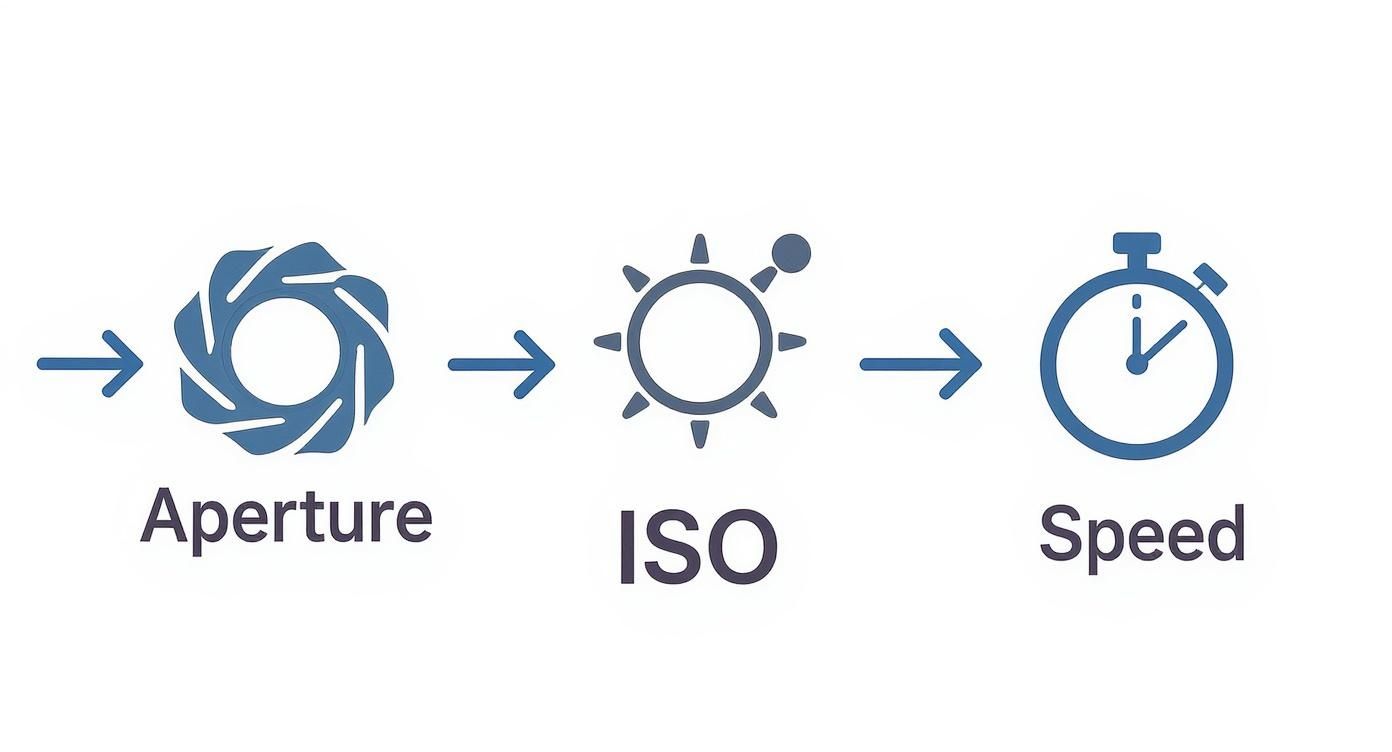
It breaks down how aperture, ISO, and shutter speed all work in tandem to get you those crisp, well-lit shots that clients love.
Having a methodical process like this isn't just about better photos; it’s about running a smarter business. With costs on the rise, studios are constantly looking for ways to be more efficient. According to industry insights from imagtor.com, a repeatable workflow is crucial for staying competitive and delivering photos quickly. This system is your ticket to a faster, more profitable shoot day.
Bringing Your Photos to Life with Editing
The work isn't over when the camera is packed away. In fact, the photoshoot itself is only half the job. Raw, unedited images are like an unfinished sketch—all the potential is there, but the real magic happens in post-processing. This is the step where you take a good photo and turn it into a fantastic marketing tool that stops buyers in their tracks.
Let's be clear: editing isn't about misleading anyone. It’s about making sure the digital photo accurately shows off the home's best features and true character. A few simple, professional adjustments can be the difference between a listing that gets scrolled past and one that gets saved to a "favorites" list.
The Foundations of Professional Editing
Before you get into the more advanced stuff, every single photo needs a few basic tweaks. These core edits form a clean, professional foundation that makes every image look polished and inviting.
Think of these as the essential, non-negotiable steps for every photo you work on.
- Color and White Balance Correction: This is probably the most important edit of all. It’s what makes the whites look genuinely white, instead of having a yellow or blue tint. Getting the colors right makes the entire image feel crisp, clean, and true to life.
- Straightening Vertical Lines: One of the biggest tells of an amateur photo is when walls look like they’re leaning inward. Using lens correction tools to get those vertical lines perfectly straight is a subtle change that screams professionalism. It gives the room a sense of stability and solid structure.
- Brightness and Contrast Adjustments: The goal is to make every room feel bright, open, and airy. Bumping up the brightness can bring out details hidden in shadows, while adjusting contrast keeps bright windows from looking like a white blob. The result is a well-balanced image that’s just pleasant to look at.
Mastering these initial steps is crucial. If you're looking for the right tools for the job, our complete guide to real estate photography editing software can help you find the perfect fit.
The Power of Virtual Staging
So, you have a beautiful photo of a completely empty room. Now what? While it might look clean, it often feels cold and doesn’t do much to help buyers imagine themselves living there. This is exactly where virtual staging comes in. It’s the process of digitally adding furniture and decor to a vacant property to show off its true potential. If you’re preparing a vacant home for sale, our guide on how to stage an empty house for sale walks through both physical and digital approaches in detail.
An empty room can be confusing. Buyers struggle to judge the scale of the space. Will their king-sized bed fit in the master? Is there enough room for their sectional sofa? Virtual staging answers these questions visually and immediately.
Virtual staging bridges the imagination gap. It transforms an empty, echoing space into a warm, inviting home, allowing buyers to connect emotionally with the property before they even set foot inside.
This digital approach is way more than just a neat trick. It’s a cost-effective and incredibly flexible alternative to traditional home staging. You can style a room in a modern theme, switch to a traditional look, or try out a minimalist vibe to appeal to different buyers—all without the headache and high cost of moving real furniture.
For agents and photographers, tools like Pedra make this process remarkably easy. You can upload a photo of an empty room and let AI furnish it in seconds. It adds realistic furniture, decor, and even lighting that complements the home’s style. This not only makes the listing far more attractive but also helps speed up the entire marketing process, getting properties sold faster.
Going Beyond the Still Image
In today's market, great photos are the cost of entry. They get you in the game. But to truly stand out, you need to offer buyers a richer, more engaging online experience. Think of it less as a photo gallery and more as an interactive digital journey.
This is where tools like virtual tours and drone photography really shine. They don't just show a property; they tell its full story, giving potential buyers the context and confidence they need to move from casual browser to serious contender.
Creating an Open House Experience with Virtual Tours
A virtual tour is the next best thing to being there. It’s an open house a buyer can attend from their living room, anytime they want. Using specialized 360-degree cameras, photographers capture a space from all angles, and software then stitches these images together to create a seamless, walkable model of the home.
This "digital twin" lets a buyer move through the property at their own pace. They can gaze up at the vaulted ceilings, check out the hardwood floors, and peek into every nook and cranny. It helps them build a real sense of the space and a much deeper connection than static photos can ever offer.
The results speak for themselves. It's predicted that by 2025, around 22% of all home listings will feature virtual tours. Why? Because listings with these tours tend to sell about 6% faster and for 3% more. You can dig into more of these stats over at PhotoUp.net.
And if you're looking to turn that raw footage into a polished final product, checking out some top real estate video editor picks is a great next step. For a deeper look at what professional videography for real estate involves — from equipment to editing — our dedicated guide has you covered.
Showcasing the Bigger Picture with Drone Photography
Interior photos master the inside, but a huge part of a property's appeal is its setting. Drone photography gives you a powerful perspective that's simply impossible to get from the ground.
Sure, the epic aerial shots look incredible, but the real power of drone footage is the context it provides.
- Lot Size & Layout: It’s the only way to truly show off the full sweep of the yard, the beautiful landscaping, or that amazing new pool and patio area.
- Neighborhood Vibe: You can capture the home’s relationship to its surroundings—is it a short walk to the park, close to great schools, or right on the waterfront?
- Property Condition: A clear, top-down view of the roof and other exterior features can answer buyer questions before they're even asked.
This bird's-eye view helps paint a complete picture of the lifestyle the property offers. It's no surprise that about 57% of buyers now want to see aerial photos in a listing. In fact, adding drone shots can boost the chance of an in-person showing by a staggering 65%. Sometimes, taking a step back to see the whole scene makes all the difference.
The technology available to market a property has exploded in recent years. Beyond just photos and videos, a whole suite of tools can help create a compelling and comprehensive listing that truly connects with buyers.
Here's a quick look at some of the most impactful modern visual tools and what they do best.
Modern Visual Tools for Real Estate Marketing
| Technology | Primary Benefit | Best Use Case |
|---|---|---|
| Virtual Tours | Creates an immersive, self-guided walk-through | Allowing out-of-town buyers to experience the home's flow and layout. |
| Drone Photography/Videography | Provides context of the property and its surroundings | Showcasing large lots, waterfront access, or neighborhood amenities. |
| AI Virtual Staging | Fills empty rooms with realistic, stylish furniture | Marketing vacant properties or showing the potential of an unfurnished space. |
| Matterport 3D Scans | Generates a detailed "digital twin" with floor plans | Providing precise measurements and a deep, interactive model for serious buyers. |
| High-Dynamic-Range (HDR) Photography | Captures balanced lighting in high-contrast scenes | Ensuring both the bright window view and the room's interior are perfectly exposed. |
Ultimately, layering these technologies gives buyers a multi-dimensional view of a property. By combining stunning interior shots with an interactive tour and aerial context, you create a listing that's not just seen, but experienced.
Your Top Real Estate Photography Questions, Answered
Even with a solid plan, a few practical questions always pop up before a shoot. Let's tackle the most common ones I hear from agents and photographers to help you get your budget, schedule, and strategy locked in.
How Much Should I Budget for a Professional Shoot?
The cost for a professional shoot can be all over the map, depending on the property's size, your photographer's experience level, and even your city. Generally speaking, you should expect to invest somewhere between $150 and $500 for a standard set of still photos for an average-sized home.
Of course, if you're listing a sprawling luxury estate or need extras like drone shots or a 3D tour, the price will naturally go up. The best approach is to get a few quotes from local photographers to see what makes sense for your listing and budget.
Here's how I think about it: photography isn't an expense, it's a critical marketing investment. That initial cost is almost always paid back (and then some) by a quicker sale at a better price.
How Long Until I Get the Photos Back?
In real estate, time is money. Every photographer worth their salt knows this and has a dialed-in process to get you the images fast. The standard turnaround time you should expect is 24 to 48 hours after the shoot wraps up.
This gives the photographer just enough time to handle the important post-processing work—things like color correction and blending different exposures—that makes the final photos look truly professional. Always double-check this timeline with your photographer beforehand so it lines up perfectly with your plans to go live.
Which Rooms Absolutely Must Be Photographed?
You'll want to photograph the whole property, but let's be honest: some rooms do more of the heavy lifting than others when it comes to winning over buyers. Nailing the photos of these key spaces is what creates that powerful first impression.
Make sure your "must-have" shot list includes:
- The Kitchen: People call it the heart of the home for a reason. Buyers will dissect this room more than any other.
- The Living Room: This is where potential buyers picture their family unwinding and making memories.
- The Primary Bedroom: A peaceful, spacious-looking main bedroom is a huge selling point.
- The Primary Bathroom: A clean, spa-like bathroom can seriously boost a home's perceived value.
These are the rooms that trigger an emotional response and where buyers really start to imagine themselves living there. Exceptional interior real estate photography of these four areas isn't just nice to have—it's essential for a listing that truly connects.
Ready to elevate your property visuals in seconds? Pedra uses AI to instantly generate stunning virtual staging, photo enhancements, and realistic renders from a single photo. Join over 20,000 real estate professionals and transform your listings today.

Related Posts
Listing Presentation Templates: Win More Clients
Professional listing presentation templates that close deals. Customizable CMA templates, market ana...
Win More Deals with Your Real Estate Listing Presentation
Master your real estate listing presentation to attract clients and close more deals. Learn expert t...
7 Ways AI for Real Estate Is Transforming the Industry in 2026
Explore how AI for real estate is reshaping the market in 2026: valuation, predictive analytics, vir...
Digital Real Estate Agency: A 2026 Guide to Transforming Your Brokerage
Run a digital real estate agency that closes faster: tools, automation, visual presentation and a st...
8 Facebook Marketing Ideas for Real Estate in 2026
Explore our top 8 Facebook marketing ideas for real estate in 2026. This guide covers paid ads, orga...
Real Estate Floor Plans 2026 - Win More Listings
Master real estate floor plans to win listings and engage buyers. Learn to create and use 2D and 3D ...