10 Real Estate Photo Tips to Sell Faster in 2026
10 practical real estate photo tips covering lighting, staging, wide-angle lenses, HDR and editing to help your listings sell faster.
In today's visually-driven market, the quality of your property photos can make or break a sale. The first showing no longer happens in person; it happens online, where listings with professional, captivating images grab immediate attention. High-quality visuals build trust and perceived value before a potential buyer even steps through the door, leading to more inquiries, faster sales, and higher offers. Simply put, exceptional photography is a non-negotiable component of a successful real estate strategy.
This guide moves beyond the basics, offering a comprehensive roundup of actionable real estate photo tips that will transform your listings from overlooked to unforgettable. We will cover everything from foundational techniques like staging and lighting to advanced strategies involving drones, consistent editing workflows, and powerful AI-powered tools for virtual staging and image enhancement. If you want to go deeper on the craft, our complete guide to real estate photography and our hands-on real estate photography tips make great companion reads.
Whether you're a seasoned agent or new to the field, these insights will equip you with the skills needed to elevate your visual marketing, attract serious buyers, and ultimately, close more deals. Let's dive in.
1. Use Wide-Angle Lenses (16-35mm)
A wide-angle lens is arguably the most crucial tool in a real estate photographer's bag. These lenses, typically in the 16-35mm focal range for a full-frame camera, allow you to capture a broader field of view than the human eye. This is essential for showcasing an entire room in a single shot, making spaces feel larger, brighter, and more inviting to potential buyers scrolling through listings.
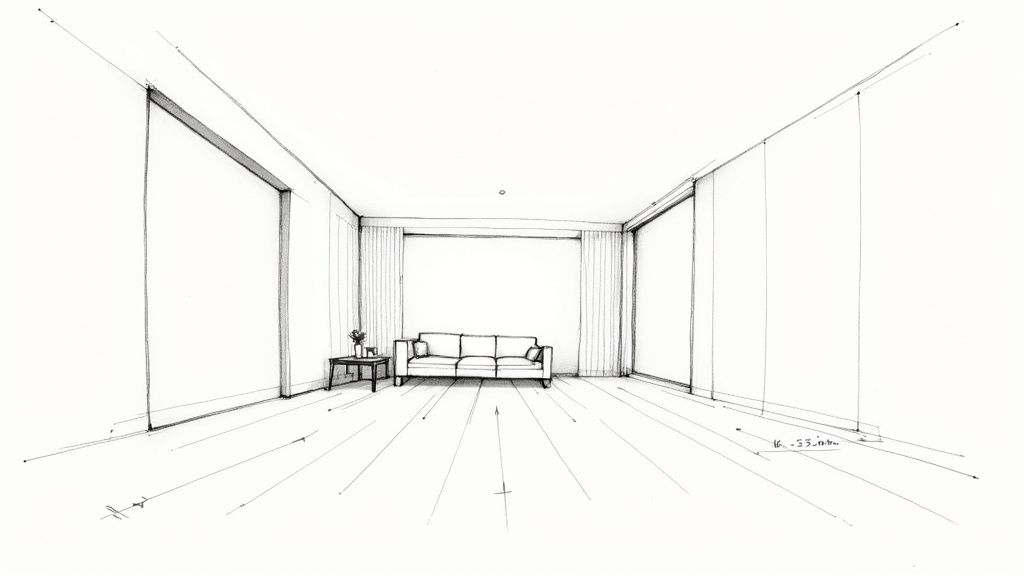
The primary benefit is context. Instead of a tight shot of a kitchen island, a wide-angle lens can capture the island, the countertops, the custom cabinetry, and the flow into the dining area all at once. This ability to convey a room's layout and scale is one of the most effective real estate photo tips for attracting serious interest.
How to Use Wide-Angle Lenses Correctly
While powerful, wide-angle lenses can create distortion if used improperly. To maintain a professional and realistic look, follow these key practices:
- Keep the Camera Level: Always ensure your camera is perfectly level, both horizontally and vertically. Tilting the camera up or down will cause vertical lines (like walls and door frames) to converge, making the room look skewed and unnatural. Use a tripod with a built-in bubble level.
- Shoot from the Right Height: Position your camera between waist and chest height (around 4-5 feet). This creates a natural, grounded perspective that accurately represents the space without distorting proportions.
- Avoid Extreme Angles: While tempting to go as wide as possible, lenses wider than 16mm can cause noticeable distortion at the edges, stretching objects unnaturally. Stick to a moderate wide angle (like 20-24mm) for most interior shots.
- Use Lens Correction Software: Post-processing tools like Adobe Lightroom and Photoshop have built-in lens correction profiles that automatically fix barrel distortion and vignetting common with wide-angle lenses.
2. Proper Lighting and Golden Hour Photography
Lighting isn't just about making a room visible; it's about creating a mood. Proper lighting is one of the most transformative real estate photo tips, as it can make a property feel warm, spacious, and welcoming. Shooting during the "golden hour," the brief period shortly after sunrise or before sunset, bathes a home in soft, directional light that enhances textures and creates a high-end, inviting atmosphere.
The primary benefit of strategic lighting is emotional appeal. A bright, well-lit interior feels clean and positive, while the warm glow of a golden hour exterior shot can evoke feelings of comfort and home. This technique highlights architectural details, showcases stunning views, and makes landscaping look lush and vibrant, directly influencing a potential buyer's perception of the property.
How to Use Lighting and Golden Hour Effectively
Mastering light involves both timing and technique. Whether using natural sunlight or artificial sources, control is key to producing professional, appealing images.
- Plan for Golden Hour: Use an app like Sun Seeker or Golden Hour One to determine the exact time for sunrise and sunset at the property's location. Plan your shoot to capture exteriors and key rooms with large windows during this optimal window.
- Balance Interior and Exterior Light: When shooting interiors with bright windows, use a technique called bracketing. Take multiple photos at different exposures (one for the dark interior, one for the bright window view) and blend them later in software like Adobe Lightroom to create a single, perfectly exposed image. This is a core HDR (High Dynamic Range) technique.
- Embrace Overcast Days: Don't cancel a shoot due to clouds. Overcast skies act as a giant softbox, providing soft, diffused light that minimizes harsh shadows. This is ideal for interior shots where you want even, consistent lighting throughout every room.
- Use Fill Flash and Reflectors: Even with good natural light, some corners may remain dark. Use an off-camera flash bounced off a ceiling or wall to "fill" in shadows gently. A simple white reflector can also bounce existing light into darker areas without looking artificial.
3. Staging and Decluttering Spaces
Before a single photo is taken, proper staging and decluttering set the foundation for a successful real estate photoshoot. This process involves strategically arranging furniture and decor while removing personal items to highlight the property's best features. The goal is to create a clean, inviting, and depersonalized environment that allows potential buyers to envision themselves living in the space, a key component of effective real estate photo tips.
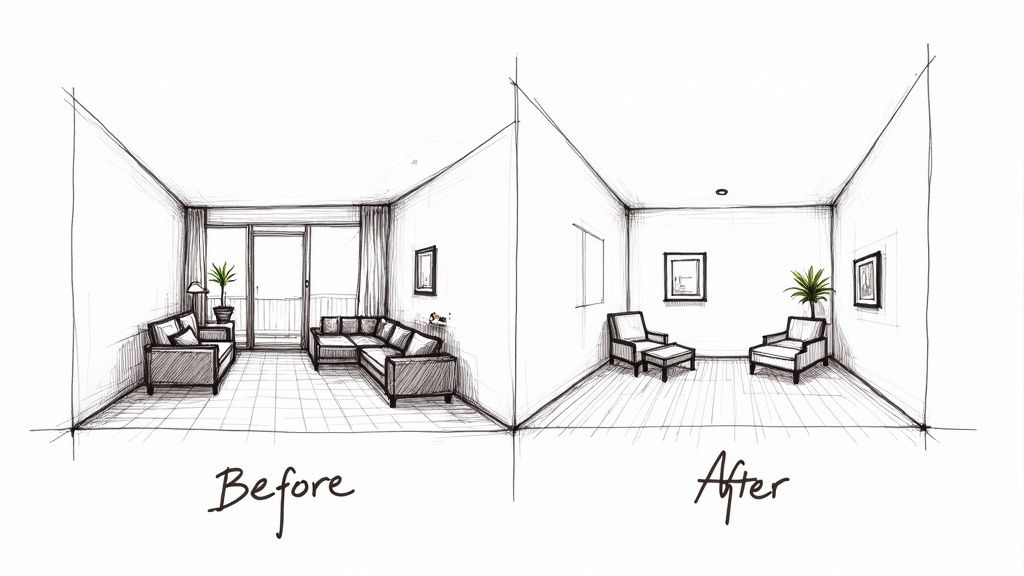
A well-staged room looks larger, feels more functional, and photographs significantly better. By removing clutter like family photos, refrigerator magnets, and excessive furniture, you eliminate distractions and allow the home's architecture and layout to take center stage. This preparation directly translates to more appealing listing photos that capture and hold a buyer's attention. For a comprehensive guide, explore this checklist to prepare a home for sale. If a room is empty or dated, you can also skip the physical setup entirely with virtual home staging.
How to Stage and Declutter for Photos
Proper preparation is crucial for creating magazine-quality images. Tackle the space room by room before the camera comes out.
- Remove Personal Items: Pack away family photos, personal collections, and children's toys. The space should feel like a model home, not someone else's house.
- Declutter Surfaces: Clear off kitchen counters, bathroom vanities, desks, and nightstands. Leave only a few tasteful decorative items, like a vase of flowers or a small plant.
- Optimize Furniture Layout: Arrange furniture to create clear walking paths and define each room's purpose. Sometimes, removing a large chair or table can make a room feel significantly more spacious.
- Add Simple, Neutral Decor: Introduce neutral-colored throw pillows, fresh towels in the bathrooms, and a new welcome mat. These small touches add a sense of polish and care.
4. Shoot at Multiple Angles and Heights
Varying your camera angles and heights is a powerful technique for providing a comprehensive visual tour of a property. Instead of capturing every room from the same static position, shooting from different perspectives reveals unique spatial relationships, highlights key features, and creates a more dynamic and engaging photo gallery for potential buyers. This approach gives a true sense of a room's flow and dimensions.
The primary benefit is offering a complete picture. A single shot of a living room might show the sofa and fireplace, but another angle could reveal the open-concept layout connecting it to the kitchen. This variety helps buyers visualize themselves in the space, making it one of the most effective real estate photo tips for building an emotional connection.
How to Vary Your Angles and Heights
Successfully using different perspectives requires a thoughtful approach to avoid a disjointed or confusing gallery. Keep these practices in mind for professional results:
- Shoot from Corners: Position your camera in a corner to capture the maximum amount of the room. This technique effectively shows three walls, giving a clear sense of the room's overall size and layout.
- Establish a Baseline Height: Start with a standard camera height, typically between 4-5 feet (chest level). This creates a natural, eye-level perspective that viewers find familiar and easy to interpret.
- Experiment with Lower Angles: After capturing your baseline shots, lower your tripod to waist level (around 3-4 feet). This perspective can make rooms feel more spacious and grand, particularly in areas with high ceilings or large windows.
- Keep the Camera Level: No matter the height, always ensure your camera is perfectly level. Use a tripod with a bubble level to keep vertical lines (walls, doorways) straight and prevent distortion.
5. Use HDR (High Dynamic Range) Processing
High Dynamic Range (HDR) photography is a technique that blends multiple exposures to create a single, perfectly lit image. In real estate, this is a game-changer for capturing rooms with bright windows, where a standard photo would either blow out the exterior view or leave the interior dark and shadowy. By merging different exposures, HDR reveals rich detail in both the darkest and brightest parts of the scene.
The primary benefit of HDR is achieving a balanced, natural-looking exposure that mimics what the human eye sees. It allows you to showcase the stunning mountain view outside the living room window while also highlighting the beautiful interior decor. This technique is one of the most effective real estate photo tips for creating vibrant, detailed, and professional-grade images that capture a property's full appeal.
How to Use HDR Processing Correctly
Creating a great HDR image requires a specific shooting and editing process. The goal is a natural look, not an over-processed, surreal image that can turn buyers off.
- Shoot Bracketed Exposures: Mount your camera on a tripod and take 3 to 5 photos of the same scene at different exposure values. A common setting is to bracket by 2 stops (-2, 0, +2). This gives you a dark, medium, and bright version of the shot.
- Use a Tripod: A tripod is non-negotiable for HDR. It ensures all your bracketed shots are perfectly aligned, which is essential for merging them cleanly in post-processing without ghosting or blurring.
- Merge in Software: Use software like Adobe Lightroom’s "Photo Merge > HDR" or dedicated programs like Photomatix Pro to combine the images. These tools analyze the exposures and blend them into one file with an expanded dynamic range.
- Process for a Natural Look: After merging, adjust the settings to avoid an overly "processed" look. Aim for realistic colors, soft shadows, and clear highlights. The best HDR photos don't look like HDR photos at all; they just look like a perfectly exposed single shot.
6. Correct Vertical Lines and Use Perspective Correction
Nothing screams "amateur photo" faster than skewed, converging vertical lines. This distortion occurs when the camera is tilted up or down, especially when photographing tall structures, causing walls, columns, and door frames to look like they are falling backward. Correcting these lines to be perfectly straight and parallel is a fundamental real estate photo tip that adds immense professionalism and architectural integrity to your images.
This technique ensures the property is represented accurately and powerfully. For exteriors of multi-story homes or commercial buildings, straight lines convey stability and grandeur. Inside, it makes rooms feel balanced and well-constructed, preventing a disorienting, funhouse-mirror effect that can subconsciously turn off potential buyers.
How to Achieve Straight Vertical Lines
Achieving perfectly straight lines involves a combination of in-camera technique and post-processing. Here are the most effective methods:
- Keep Your Camera Perfectly Level: The best way to prevent distortion is to shoot it right in the camera. Use a tripod with a bubble level and ensure the camera sensor is parallel to the subject. Avoid tilting the camera up.
- Shoot from the Right Height: As with wide-angle lenses, a chest-level height (around 5 feet) often provides the most natural perspective and minimizes the need for extreme correction later.
- Step Back and Give Space: If you're too close to a tall building, you'll be forced to tilt up. Step back further to get the entire structure in the frame without tilting, then crop in post-production if needed.
- Use Lens Correction Tools: Software like Adobe Lightroom is your best friend here. The "Transform" panel with its "Guided Upright" tool allows you to draw lines along vertical elements in the photo, and the software will automatically straighten the entire image.
7. Capture Lifestyle and Aspirational Imagery
Beyond simply documenting rooms, lifestyle photography tells a story about the experience of living in a home. This technique involves showing how buyers might actually use and enjoy the property, creating an aspirational narrative that helps them form an emotional connection. Instead of an empty patio, you show a couple enjoying wine at sunset, transforming the space from mere bricks and mortar into a place for relaxation and making memories.
The primary benefit is creating a powerful emotional pull. A shot of a family preparing a meal in the kitchen or a person reading by a sunny window allows potential buyers to envision themselves in those moments. This is one of the most effective real estate photo tips for elevating a listing from a set of features to a desirable lifestyle, making it far more memorable than the competition.
How to Create Effective Lifestyle Photos
Staging lifestyle shots requires a careful balance between authenticity and aspiration. The goal is to make the scene feel natural, not like a staged advertisement.
- Obtain Written Permission: Always get a signed model release from any individuals featured in the photos, even if they are the homeowners. This is crucial for legal protection.
- Direct for Authenticity: Guide your subjects with actions rather than poses. Ask them to genuinely interact with each other or the space, such as clinking glasses or turning the page of a book. This creates more believable and engaging images.
- Focus on the Space's Utility: Use people to highlight a key feature. For example, show someone working comfortably in the home office to emphasize its functionality or a group of friends in the entertainment room to showcase its social potential.
- Integrate with Standard Shots: Lifestyle images should supplement, not replace, standard architectural photos. Use them sparingly in your gallery to add emotional impact, perhaps as the hero image or to break up a series of empty room shots.
8. Exterior and Curb Appeal Photography
The exterior shot is the digital handshake of a property listing. It's often the first image a potential buyer sees and is crucial for creating a positive first impression. Strong curb appeal photography showcases the home's architecture, landscaping, and overall setting, enticing buyers to click through and explore the rest of the home. This is one of the most vital real estate photo tips because a compelling exterior can significantly increase listing views.
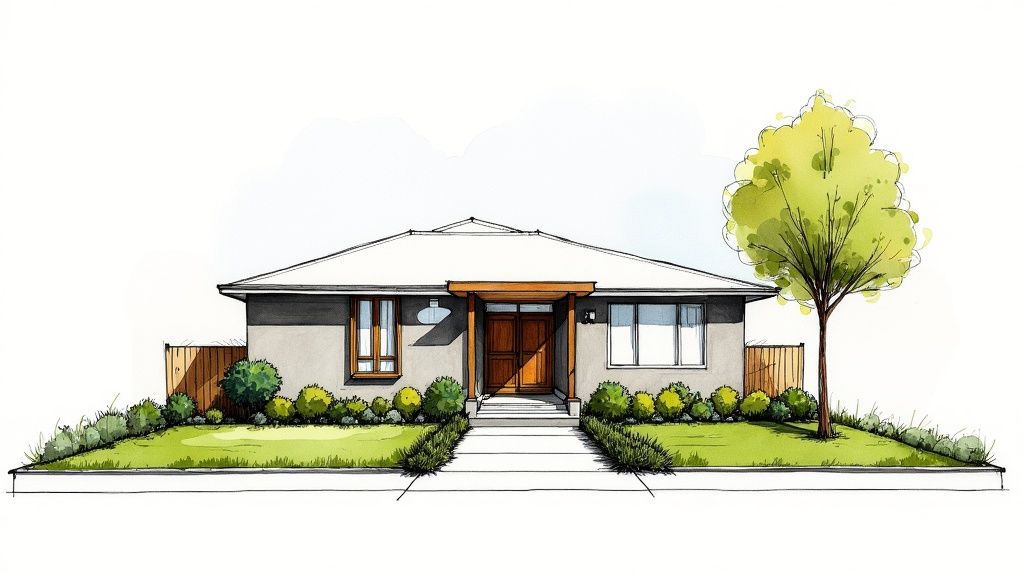
A great exterior photo doesn't just show the building; it sells a lifestyle. It conveys pride of ownership and helps buyers visualize themselves arriving home. Whether it's a Colonial home glowing at sunset or a modern house with striking architectural lines, the goal is to present the property at its absolute best, making it stand out from dozens of other listings.
How to Capture Stunning Exterior Photos
To create exterior images that grab attention and drive interest, focus on preparation, timing, and composition. A little planning goes a long way in making a property look its most inviting.
- Prepare the Property: Before shooting, remove all clutter. This includes moving cars from the driveway, hiding trash cans and garden hoses, and tidying up any toys or yard equipment. Ensure the lawn is mowed and landscaping is trimmed.
- Shoot During the "Golden Hour": The hour after sunrise and the hour before sunset provide soft, warm, and directional light that minimizes harsh shadows and makes a home look inviting. This flattering light is perfect for highlighting architectural details.
- Find the Best Angle: Don't just shoot straight-on from the middle of the street. Walk around and find an angle that best showcases the home's features. A shot from a slight angle often adds more depth and dimension than a flat, head-on perspective.
- Keep Vertical Lines Straight: Just like with interiors, ensure vertical lines like the sides of the house, door frames, and windows are perfectly straight. Use a tripod and a level to avoid distortion that makes the home look like it's leaning.
9. Drone and Aerial Photography
Drone photography elevates a property listing, quite literally, by providing unique aerial perspectives that ground-level shots cannot capture. These images reveal the full context of a property, including its size, layout, landscaping, and relationship to the surrounding neighborhood. For expansive estates, waterfront homes, or properties with unique land features, aerial shots are a powerful tool for creating a dramatic first impression.
This bird's-eye view helps potential buyers understand the entire scope of their potential investment. An aerial shot can showcase a home’s proximity to a park, its expansive backyard, or the beautiful shoreline it sits on, all in a single, compelling image. This context is one of the most effective real estate photo tips for properties where the land is as much a feature as the house itself.
How to Use Drone Photography Effectively
Flying a drone requires both skill and legal compliance. To produce high-quality, professional aerial shots that enhance your listing, follow these essential practices:
- Ensure Legal Compliance: In the U.S., you must obtain an FAA Part 107 certification to fly a drone for commercial purposes. Always check local and HOA regulations before flying.
- Plan Your Shots: Scout the location ahead of time to identify the best angles and potential obstacles. Plan your flight path to capture key features like pools, large yards, or nearby amenities.
- Fly During Golden Hour: The soft, warm light during the hour after sunrise or before sunset will make your aerial photos look stunning and dramatic, minimizing harsh shadows.
- Capture Both Photos and Video: Still images are perfect for the main listing photo, while a short 15-30 second video clip adds a dynamic element to social media posts and video tours. You can learn more about how to use aerial photography for real estate to maximize its impact.
10. Consistent Editing and Color Grading
Consistent editing and color grading across all images in a listing are what separates an amateur gallery from a professional, high-end presentation. This process involves applying a uniform style of adjustments for exposure, color, and contrast, creating a cohesive visual narrative that feels polished and intentional. It ensures a seamless viewing experience as potential buyers click from the living room to the kitchen to the backyard.
A consistent look not only enhances the property's appeal but also builds your brand as a photographer. Whether it’s a bright and airy style for a beachfront home or a warm, vibrant look for a family-oriented property, a signature editing style makes your work instantly recognizable. This is one of the most impactful real estate photo tips for creating a strong portfolio.
How to Achieve Consistent Editing
Developing a repeatable editing workflow is key to efficiency and quality. This ensures every photo in the gallery aligns perfectly with the others, telling a unified story.
- Develop Lightroom Presets: Create and save your own custom editing presets in software like Adobe Lightroom. This allows you to apply a consistent baseline of adjustments to every photo from a shoot with a single click, which you can then fine-tune.
- Shoot for Consistency: Your editing process starts in-camera. Use a white balance card or a gray card on-site to set a custom white balance, ensuring accurate colors from the start. This drastically reduces correction time in post-production.
- Establish Style Guides: Before editing, decide on the mood. For instance, a modern minimalist home might use a cool, clean color grade, while a traditional home may benefit from warmer tones. Stick to this guide for all images.
- Batch Process Your Edits: Use editing software to sync settings like white balance, contrast, and lens corrections across multiple images taken in the same room. For more information, check out these top choices for real estate photography editing software.
10-Point Real Estate Photo Tips Comparison
| Technique | Implementation Complexity 🔄 | Resource Requirements ⚡ | Expected Outcomes 📊 ⭐ | Ideal Use Cases 💡 | Key Advantages ⭐ |
|---|---|---|---|---|---|
| Use Wide-Angle Lenses (16-35mm) | 🔄 Moderate — requires careful positioning and distortion control | ⚡ Moderate — quality 16–35mm lens (investment), tripod optional | 📊⭐ Wider field-of-view; rooms appear larger; comprehensive room coverage | 💡 Interiors, small rooms, exteriors needing context | ⭐ Captures full rooms, reduces number of shots, shows architecture |
| Proper Lighting and Golden Hour Photography | 🔄 Moderate — timing, mixing natural and supplemental light | ⚡ Low–Moderate — tripod, reflectors, external flash, planning apps | 📊⭐ Warm, flattering images; reduced harsh shadows; enhanced textures | 💡 Exteriors, view-driven shots, hero images for listings | ⭐ Natural warmth, cost-effective for exteriors, mood enhancement |
| Staging and Decluttering Spaces | 🔄 Moderate–High — coordination, prep, possible rentals | ⚡ Moderate — furniture/props, staging professionals or rentals | 📊⭐ Increased perceived value and spaciousness; cleaner visuals | 💡 Vacant homes, listings needing emotional appeal or faster sale | ⭐ Emotional connection; highlights features; improves photos |
| Shoot at Multiple Angles and Heights | 🔄 Moderate — more time on site and consistency control | ⚡ Low–Moderate — tripod, ladder/pole, additional storage | 📊⭐ Comprehensive visual documentation; clearer layout understanding | 💡 Any property; rooms where flow and proportions matter | ⭐ Shows spatial relationships; creates dynamic galleries |
| Use HDR (High Dynamic Range) Processing | 🔄 High — requires bracketing, alignment, careful tone mapping | ⚡ Moderate — tripod, storage, HDR-capable software | 📊⭐ Balanced exposures; preserved detail in shadows and highlights | 💡 Interiors with bright windows, mixed-light scenes, luxury listings | ⭐ Handles high-contrast scenes; produces dramatic, detailed images |
| Correct Vertical Lines & Perspective Correction | 🔄 Moderate — shooting technique or post-processing skill | ⚡ Moderate–High — tilt-shift lens or editing software/time | 📊⭐ Professional, accurate architectural representation; straight lines | 💡 Multi-story exteriors, facades, commercial/architectural shoots | ⭐ Prevents keystoning; preserves architectural integrity |
| Capture Lifestyle & Aspirational Imagery | 🔄 High — coordination, directing talent, legal releases | ⚡ Moderate–High — models, props, styling, additional logistics | 📊⭐ Emotional engagement; memorable listings; higher social traction | 💡 Luxury homes, lifestyle-focused marketing, resorts | ⭐ Builds emotional connection; differentiates listing from competitors |
| Exterior & Curb Appeal Photography | 🔄 Moderate — timing, prep, weather considerations | ⚡ Moderate — landscaping prep, timing tools, tripod | 📊⭐ Strong first impression; higher click-through and viewings | 💡 All listings (critical); street-facing and curb-dependent properties | ⭐ Drives initial engagement; emphasizes neighborhood and entrance |
| Drone & Aerial Photography | 🔄 High — pilot skill, flight planning, regulatory compliance | ⚡ High — drone hardware, Part 107 certification, insurance | 📊⭐ Unique aerial perspectives; clear property layout and context | 💡 Large lots, waterfront, rural estates, developments | ⭐ Reveals acreage and context; strong marketing differentiator |
| Consistent Editing & Color Grading | 🔄 Moderate–High — time and expertise to maintain style | ⚡ Moderate — editing software, presets, calibrated monitor | 📊⭐ Cohesive galleries; stronger brand identity; perceived higher quality | 💡 All listings; photographers scaling workflows and branding | ⭐ Consistency across images; efficient batch processing; brand recognition |
Elevate Your Listings from Good to Unforgettable
The journey from a standard property listing to a standout visual experience is built on the foundation of exceptional photography. We’ve explored the essential pillars that support this transformation, moving far beyond simple point-and-shoot methods. By now, you understand that great real estate photography is a blend of art and science, a strategic process designed to evoke emotion and create a powerful first impression that resonates with potential buyers.
This isn't just about taking pictures; it's about telling a compelling story. The real estate photo tips covered in this guide are your narrative tools. A wide-angle lens (16-35mm) doesn't just show a room; it creates a sense of space and openness. Shooting during the "golden hour" doesn't just light a home; it bathes it in a warm, inviting glow that feels aspirational. Each technique plays a crucial role in shaping the buyer's perception before they ever step foot on the property.
From Technical Skill to Emotional Connection
The most powerful takeaways from our discussion center on moving beyond technical execution to create an emotional connection. Remember these core principles:
- Preparation is Paramount: The magic begins before the camera is even turned on. Meticulous staging and decluttering are non-negotiable steps that create a clean, appealing canvas. A well-prepared space allows the home’s best features to shine without distraction.
- Composition Tells the Story: Your choice of angles, heights, and perspective correction directly influences how a buyer interprets a space. Straight vertical lines convey stability and professionalism, while varied shots add dynamic interest and guide the viewer’s eye through the home’s layout.
- Consistency Builds a Brand: A uniform editing style across all your photos, from interior shots to drone footage, establishes a polished and professional brand identity. This consistency builds trust and makes your entire portfolio look more cohesive and high-end.
Your Actionable Path Forward
Mastering these real estate photo tips is an ongoing process, but you can start implementing them immediately. Build a simple pre-shoot checklist from the concepts above: schedule for the best light, plan a comprehensive shot list, and prepare your gear for everything from wide interior shots to detailed close-ups. High-quality images attract more views, generate more qualified leads, and help properties sell faster.
Ready to apply these real estate photo tips faster? Pedra uses AI to handle much of the heavy lifting, from virtual staging and item removal to image enhancement and sky replacement, so you can elevate listings in a single click. Try Pedra.

Related Posts
7 Ways AI for Real Estate Is Transforming the Industry in 2026
Explore how AI for real estate is reshaping the market in 2026: valuation, predictive analytics, vir...
Digital Real Estate Agency: A 2026 Guide to Transforming Your Brokerage
Run a digital real estate agency that closes faster: tools, automation, visual presentation and a st...
8 Facebook Marketing Ideas for Real Estate in 2026
Explore our top 8 Facebook marketing ideas for real estate in 2026. This guide covers paid ads, orga...
Real Estate Floor Plans 2026 - Win More Listings
Master real estate floor plans to win listings and engage buyers. Learn to create and use 2D and 3D ...
10 Home Exterior Renovation Ideas to Boost Curb Appeal in 2026
Discover 10 home exterior renovation ideas to boost curb appeal in 2026, from siding and stone accen...
Home Staging Tips: 8 Ways to Sell a Home Faster in 2026
Looking to sell a property faster and for top dollar? These eight essential home staging tips will s...