Realtor photography tips 5 quick edits for stunning listings
Realtor photography tips: quick edits and lighting tweaks to boost listings and attract more buyers.
In today's competitive real estate market, your property photos are more than just images; they are your first, and often most important, showing. Potential buyers swipe through hundreds of listings, and the quality of your photography determines whether they stop and look or keep scrolling. Low-quality, poorly lit, or cluttered photos can cost you showings, offers, and ultimately, a sale. This is why mastering the art of real estate photography is no longer a luxury but a fundamental skill for every successful agent.
This guide provides 8 actionable realtor photography tips, moving beyond the obvious to give you the specific techniques and modern tools needed to capture stunning visuals. These visuals attract serious buyers and help close deals faster. We'll cover everything from pre-shoot preparations and advanced composition to leveraging AI tools like Pedra to streamline your post-processing. Our goal is to ensure every listing you post is picture-perfect and stands out from the competition. You will learn practical steps to improve your images immediately, turning casual online browsers into interested potential buyers who book a viewing.
1. Professional Lighting and Golden Hour Photography
Capturing a property in its best light is a fundamental realtor photography tip, and nothing achieves this better than harnessing the power of natural light during the "golden hour." This period, occurring shortly after sunrise and just before sunset, casts a warm, soft, and directional glow that artificial lighting struggles to replicate. The low angle of the sun during this time minimizes harsh shadows, highlights architectural textures, and bathes the property in a welcoming, luxurious ambiance that can significantly boost its perceived value.
This technique is a staple for high-end listings because it evokes emotion and creates a memorable first impression. Luxury firms like Sotheby's International Realty and top agents in competitive markets consistently use golden hour shoots to make their properties stand out. The goal is to sell not just a house, but a lifestyle, and this warm, inviting light helps create that aspirational feeling.
How to Implement Golden Hour Photography
Implementing this technique requires planning but delivers exceptional results. It's not just about showing up at the right time; it's about understanding how to use that specific light to your advantage.
- Scout in Advance: Visit the property during the golden hour a day or two before the shoot. Note which direction the sun sets or rises and how the light interacts with the home's key features, like the front entrance or back patio.
- Arrive Early: Get to the property at least 30 minutes before the golden hour begins. This gives you time to set up your equipment, test different angles, and be ready to start shooting the moment the light is perfect.
- Use Reflectors: For areas that fall into shadow, like a covered porch, use a simple reflector to bounce the warm sunlight back into those spaces. This helps create a balanced, evenly lit exposure without resorting to a flash.
- Create Rim Lighting: Position your camera so the sun is behind or to the side of the property. This can create a beautiful "rim light" effect that outlines the roofline and architectural details, making the home pop against the sky.
2. Wide-Angle Lens Photography
One of the most impactful realtor photography tips is to master the use of a wide-angle lens. These lenses, typically in the 14-24mm range for a full-frame camera, capture a much broader field of view than standard lenses. This allows you to fit more of a room into a single shot, making spaces feel larger, more open, and more inviting to potential buyers scrolling through listings. It provides crucial context by showing how different areas of a room relate to one another.
This technique is a non-negotiable standard across the industry. Major platforms like Zillow and Airbnb highlight the importance of wide-angle shots because they are proven to attract more clicks and engagement. They offer a comprehensive view that helps buyers visualize themselves in the space, answering questions about layout and flow before they even step foot inside. High-end property listings almost exclusively use wide-angle interior shots to create a sense of grandeur and space.
How to Implement Wide-Angle Photography
Using a wide-angle lens effectively requires more than just attaching it to your camera. The key is to create an expansive view without distorting the room’s proportions, which can mislead buyers.
- Maintain Straight Lines: Keep your camera perfectly level to avoid converging vertical lines, where walls appear to be leaning inward or outward. A tripod with a built-in bubble level is essential for this.
- Shoot from Corners: Position your tripod in the corner of a room, facing inward. This vantage point naturally maximizes the visible space and captures the room's depth and layout most effectively.
- Use an Appropriate Aperture: Set your aperture between f/8 and f/11. This range provides a deep depth of field, ensuring that both the foreground (a nearby chair) and the background (a window view) are sharp and in focus.
- Position at Eye Level: Place your camera at a height of about 5 feet (1.5 meters). This creates a natural, realistic perspective that mimics how a person would view the room, preventing distortion of furniture and fixtures.
3. Drone and Aerial Photography
One of the most impactful realtor photography tips for the modern market is leveraging drone and aerial photography to showcase a property's full context. This technique provides a unique, bird's-eye perspective that standard ground-level shots cannot capture. It effectively highlights the property's size, roof condition, landscaping, and its relationship to the surrounding neighborhood, nearby amenities, or natural features like a waterfront or park.
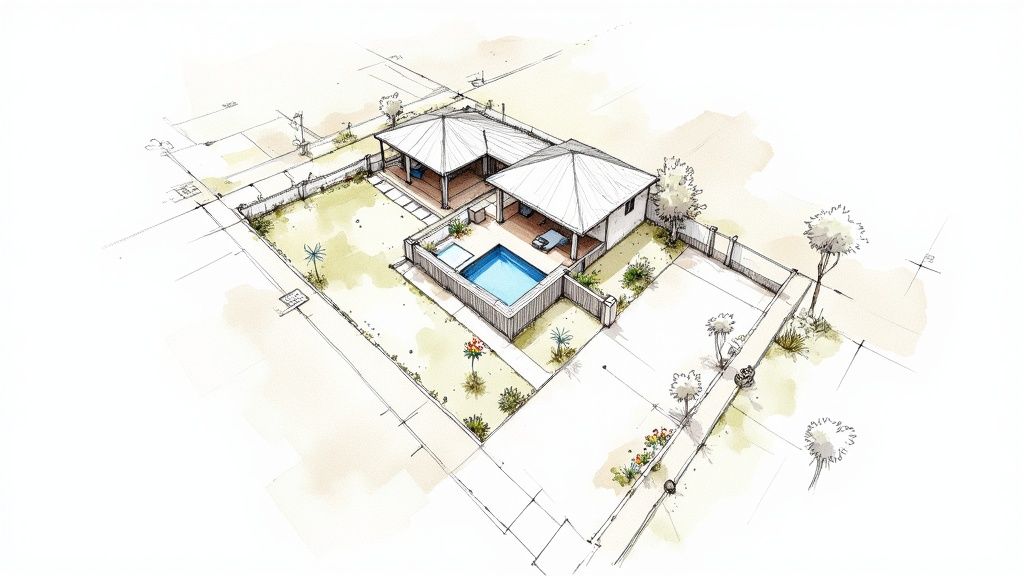
This approach has become a standard for luxury listings and is increasingly adopted across all price points to gain a competitive edge. Leading agencies like Sotheby's International Realty and premium listings on Zillow consistently use aerial views to tell a more complete story about a property. For expansive estates in Malibu or waterfront homes in Miami, drone footage is not just a bonus; it's an expectation that helps justify premium pricing by showcasing scale and location.
How to Implement Drone and Aerial Photography
Successfully implementing drone photography requires more than just owning a drone; it involves technical skill, legal compliance, and a creative eye to produce compelling visuals.
- Obtain FAA Certification: In the U.S., you must have an FAA Part 107 Remote Pilot Certification to fly a drone for commercial purposes. Operating without one can result in significant fines, so this is a non-negotiable first step.
- Check Local Regulations: Always verify local zoning laws and any specific HOA restrictions before planning a shoot. Some areas have no-fly zones or privacy regulations that must be respected.
- Fly During Golden Hour: Just like ground photography, aerial shots benefit immensely from the soft, warm light of the golden hour. This light accentuates the property's features and creates long, dramatic shadows that add depth.
- Maintain Smooth, Steady Movements: For video, avoid jerky or rapid movements. Use slow, deliberate pans and reveals to create a professional, cinematic feel. Start with a wide establishing shot and slowly move in to focus on key features.
- Focus on High-Quality Capture: Shoot in 4K resolution to future-proof your content and allow for cropping without losing quality. Beyond the drone itself, the camera you choose is critical for capturing high-quality images; consider this guide on choosing a camera for drones to meet your creative vision.
4. Virtual Staging and HDR Photography
One of the most impactful realtor photography tips involves leveraging technology to showcase a property's full potential, especially when it's vacant or has challenging lighting. This is achieved through a powerful combination of High Dynamic Range (HDR) processing and virtual staging. HDR photography blends multiple exposures to create a single, perfectly lit image with rich detail in both the brightest highlights and darkest shadows, while virtual staging digitally adds stylish furniture and decor to empty rooms.
This dual approach solves two major problems: it makes vacant properties feel warm and inviting, and it ensures every room looks bright and spacious, even in difficult lighting. Companies like BoxBrownie and iStaging have popularized this technique, making professional-grade results accessible to agents everywhere. Builders of new construction homes frequently use virtual staging to help buyers visualize a finished, lived-in space before it's even complete.
How to Implement Virtual Staging and HDR
Successfully integrating these techniques requires a focus on realism and transparency to build trust with potential buyers. The goal is to enhance, not deceive, by presenting a clear and appealing vision of the home.
- Keep HDR Natural: Avoid over-processing your HDR images. The result should look vibrant and clear, not cartoonish or surreal. The best HDR photos look like a perfect natural-light shot, just with a greater range of visible detail.
- Choose Complementary Furniture Styles: When virtually staging, select furniture and decor that match the home's architectural style and target demographic. A modern farmhouse should not be staged with ultra-modern, minimalist furniture.
- Ensure Lighting Consistency: The lighting on the virtual furniture must match the natural light in the photograph. Look for shadows and highlights that align with the room's windows and light sources for a believable result.
- Disclose Digital Alterations: Always include a disclaimer in the listing description, such as "Some images have been virtually staged," to maintain transparency with buyers and comply with MLS regulations.
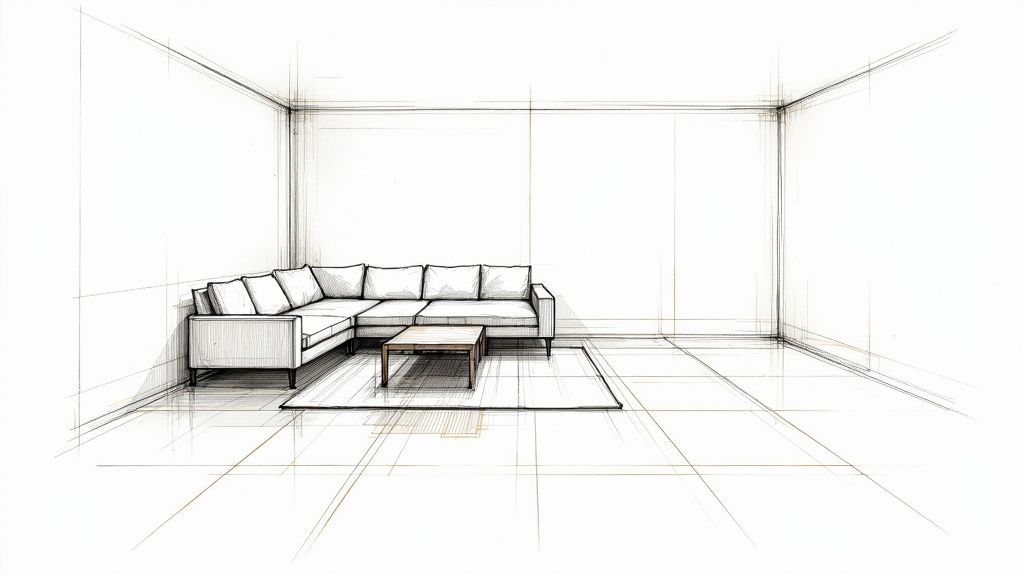
5. Proper Home Staging for Photography
A photograph can only be as good as the subject it captures, which is why proper home staging is one of the most critical realtor photography tips. Staging is the art of strategically preparing and arranging a property to highlight its best features, maximize its visual appeal, and create an emotional connection with potential buyers. A well-staged home looks bigger, brighter, and more inviting in photos, helping it stand out in a crowded online marketplace.
This foundational step often determines the success of a listing. Data from the Real Estate Staging Association shows that staged homes frequently sell faster and for more money. By creating a clean, neutral, and aspirational canvas, you allow buyers to envision themselves living in the space rather than being distracted by the current owner's personal taste or clutter. It's about selling a lifestyle, not just a structure.
How to Implement Proper Home Staging
Effective staging is a methodical process that turns a lived-in house into a market-ready product. It requires a keen eye for detail and a focus on creating wide-open, appealing spaces that photograph well. For a deeper dive, you can explore these detailed home staging tips to master the process.
- Declutter and Depersonalize: This is the most important step. Remove at least 50% of the visible items from every room. Pack away family photos, personal collections, religious items, and excess furniture to create a neutral and spacious environment.
- Deep Clean Everything: Ensure every surface, from windows and floors to countertops and baseboards, is spotless. A clean home signals to buyers that the property has been well-maintained and looks pristine in high-resolution photos.
- Arrange Furniture for Flow: Position furniture to define each room's purpose and create clear walking paths. The goal is to make rooms look as large and functional as possible, pulling furniture away from walls to create more intimate arrangements.
- Add Simple, Tasteful Accents: Enhance the space with neutral, modern decor. Fresh flowers, a bowl of fruit on the kitchen counter, new throw pillows on the sofa, and crisp white towels in the bathroom add a touch of color and sophistication without being distracting.
6. Vertical Integration and Floor Plan Photography
Modern buyers want more than just pretty pictures; they want to understand the property's flow and layout before they even schedule a visit. This is where vertical integration comes in. This realtor photography tip involves creating a complete visual package that includes not only high-quality photos but also detailed floor plans and immersive 3D representations, offering potential buyers a comprehensive understanding of the space. It’s about documenting a property, not just decorating it with images.
This comprehensive approach has become a standard in competitive markets, popularized by innovators like Matterport and now expected on major portals like Zillow and Realtor.com. Premium firms such as Sotheby's and Christie's regularly include interactive floor plans and 3D tours in their listings because it answers key buyer questions upfront, builds trust, and helps listings stand out in a crowded digital landscape. It allows a buyer to virtually "walk through" a home and see how rooms connect.
How to Implement Vertical Integration
Integrating floor plans and 3D tours is less about technical photography skills and more about strategic planning to create a cohesive marketing asset.
- Shoot Multiple Angles: For each significant room, capture at least three distinct angles: a wide shot to show the entire space, a medium shot to highlight a key feature, and a detail shot to showcase quality finishes or fixtures.
- Invest in Professional Floor Plans: While DIY apps exist, a professionally created floor plan offers accuracy and a polished look. These services often include room dimensions and total square footage, which are crucial details for buyers. For a deeper dive, you can learn more about how floor plans for realtors can elevate a listing.
- Incorporate 3D Tours: Use technology like Matterport to create immersive 3D virtual tours. This allows buyers to navigate the property at their own pace, giving them a true sense of the space and layout that static photos cannot convey.
- Organize Photos Logically: When uploading your gallery, arrange the photos to follow a logical path through the home, such as starting at the entrance and moving floor by floor. This helps potential buyers mentally connect the images to the floor plan.
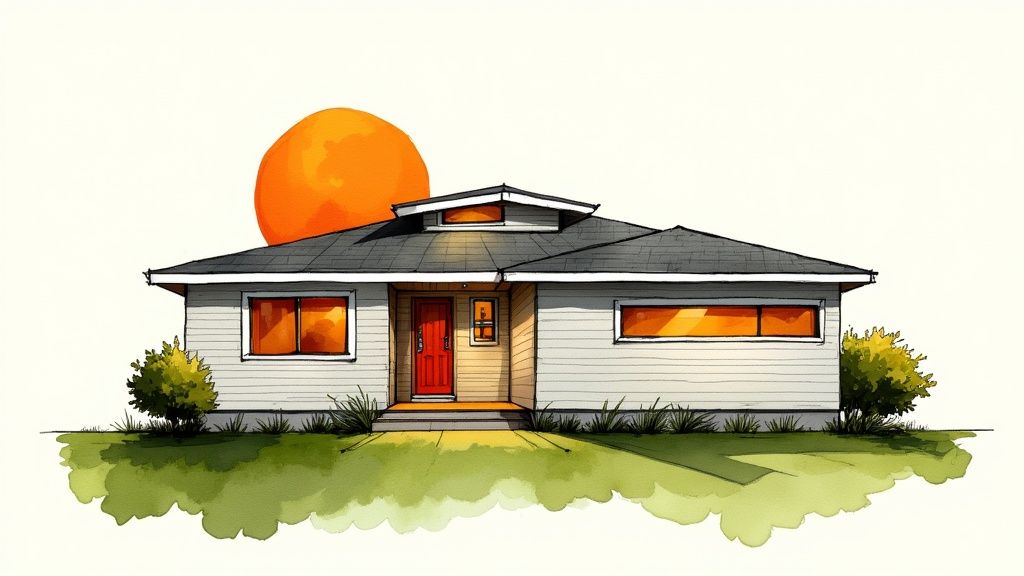
7. Exterior and Curb Appeal Photography
The first picture a potential buyer sees online is almost always the front exterior, making curb appeal photography one of the most critical realtor photography tips. Since studies show that up to 80% of homebuying decisions are influenced by a property's initial appearance, a stunning exterior shot is non-negotiable. It sets the tone for the entire listing, creates a powerful first impression, and can dramatically increase click-through rates and showing requests.
This focus on the exterior is a core strategy for platforms like Zillow and Redfin, whose data confirms that listings with high-quality exterior photos generate significantly more interest. For luxury properties, this means highlighting architectural details like stonework, while for a charming cottage, the focus might be on the welcoming garden path and vibrant landscaping. The goal is to capture the home's character and invite buyers to imagine themselves walking through the front door.
How to Implement Exterior and Curb Appeal Photography
Maximizing curb appeal in photos involves more than just pointing the camera at the house; it requires careful preparation and strategic composition to showcase the property at its absolute best.
- Prepare the Scene: Before shooting, ensure the property is immaculate. Power wash the driveway, clean windows and gutters, trim bushes back from the house, and add a fresh layer of mulch to garden beds.
- Remove Distractions: Take down any seasonal decorations, personal items, trash cans, or vehicles from the driveway and street in front of the house. The focus should be solely on the home itself.
- Shoot from Street Level: Capture the main exterior shot from a straight-on, street-level angle. This provides a clear and comprehensive view of the entire front elevation, which is exactly what buyers expect to see first.
- Highlight the Pathway: Take additional shots that capture the pathway leading to the front door. This creates a sense of invitation and helps buyers visualize the experience of arriving home.
- Consider a Twilight Shot: For properties with attractive outdoor lighting, a "dusk" or twilight shoot can create a warm, high-end ambiance that makes the listing stand out from the competition.
8. Post-Processing, Color Correction, and Editing Optimization
The work of a real estate photographer doesn't end when the camera is put away; in fact, some of the most critical work happens during post-processing. This technical editing phase is a non-negotiable realtor photography tip that transforms raw, unprocessed files into polished, marketing-ready images. It involves a systematic workflow of adjustments, including color correction, exposure balancing, perspective correction, and noise reduction, to ensure photos accurately and attractively represent the property.
This step separates amateur snapshots from professional marketing assets. Industry-standard tools like Adobe Lightroom and Capture One are used by over 85% of professional real estate photographers to batch-process images, allowing them to edit 30-50 photos per hour. A professional might spend 20-40 hours editing a single luxury property to perfection, highlighting the importance of this detailed process. The goal is to present a clean, bright, and realistic version of the home that resonates with online buyers.
How to Implement Post-Processing Optimization
An efficient and consistent editing workflow ensures every image in a listing looks cohesive and professional. This requires technical skill and a clear understanding of the desired final look.
- Shoot in RAW Format: Always capture images in RAW instead of JPEG. This file format retains all the sensor's image data, providing maximum flexibility for adjusting exposure, white balance, and colors in post-production without losing quality.
- Correct Distortions First: Before making any other adjustments, correct perspective and lens distortions. Use software tools to straighten vertical lines (so walls don't look like they're leaning) and ensure all horizon lines are perfectly level.
- Calibrate Your Monitor: To ensure your color corrections are accurate, use a calibration tool like a ColorChecker Passport. This guarantees that the colors you see on your screen are how they will appear on other devices, preventing a room from looking too yellow or blue.
- Use Consistent Presets: Develop or purchase a set of presets specifically for real estate. Applying a consistent preset to all images from a property ensures a uniform look and feel, saving significant time. You can fine-tune from there, but the baseline will be consistent. For more detailed information, explore the top real estate photography editing software options.
8-Point Realtor Photography Comparison
| Technique | 🔄 Implementation Complexity | ⚡ Resource Requirements | 📊 Expected Outcomes (⭐) | 💡 Ideal Use Cases |
|---|---|---|---|---|
| Professional Lighting and Golden Hour Photography | Medium — time-window planning and scouting | Low — camera, lens, optional reflectors | High — warm, flattering images; strong emotional appeal (⭐⭐⭐⭐) | Exteriors, luxury listings, lifestyle-oriented shots |
| Wide-Angle Lens Photography | Medium — requires leveling, composition skill | Medium — quality wide-angle lens (expensive) | High — increases perceived space and layout clarity (⭐⭐⭐⭐) | Small rooms, open-floor plans, thumbnail-first impressions |
| Drone and Aerial Photography | High — certification, flight planning, legal checks | High — drone, ND filters, batteries, permits | Very High — unique perspectives; boosts engagement and inquiries (⭐⭐⭐⭐⭐) | Large lots, waterfront or estate properties, neighborhood context |
| Virtual Staging and HDR Photography | Medium–High — advanced editing and ethical disclosure | Medium — software/services or outsourcing per-image cost | High — shows potential and recovers detail; risk of appearing unrealistic (⭐⭐⭐⭐) | Vacant homes, new construction, poor-light interiors |
| Proper Home Staging for Photography | Medium — coordination, cleaning, possible rental logistics | Low–Medium — labor, minor rentals or decor | Very High — improves sale speed/price and buyer imagination (⭐⭐⭐⭐⭐) | Most listings, especially mid-market and family homes |
| Vertical Integration & Floor Plan Photography | High — multiple captures, 3D/plan creation workflow | High — Matterport/3D tools, professional floor-plan services | Very High — reduces showings, aids remote buyers (⭐⭐⭐⭐⭐) | Luxury listings, complex layouts, out-of-area buyers |
| Exterior and Curb Appeal Photography | Low–Medium — prep and timing (weather dependent) | Low–Medium — landscaping, cleaning, timing | High — first-impression driver; increases inquiries (⭐⭐⭐⭐) | All listings, especially street-visible and suburban homes |
| Post-Processing, Color Correction & Editing Optimization | Medium — software skill and consistent workflow | Medium — editing software, calibrated monitor, time | Very High — technical polish; consistent brand aesthetic (⭐⭐⭐⭐⭐) | All listings; essential final step before publishing |
Automate Your Success with AI-Powered Visuals
The journey from a standard property photo to a captivating marketing asset is built on the principles we've covered. From harnessing the golden hour for perfect lighting to using a wide-angle lens to create a sense of space, each tip is a crucial piece of the puzzle. Mastering exterior shots, proper staging, and fundamental composition rules forms the foundation of compelling real estate photography. However, the true differentiator in today's fast-paced market isn't just taking great photos; it's producing them efficiently and consistently.
The Modern Realtor's Advantage: Speed and Quality
For busy real estate agents, the time spent on post-processing can be a significant bottleneck. While understanding color correction and HDR photography is valuable, manually editing every image for every listing is simply not a scalable strategy. This is where leveraging technology becomes a game-changer. The goal is to build a workflow that combines your on-site photography skills with the power of intelligent automation.
Think of it this way: your role is to capture the best possible raw material using the tips from this guide. You stage the home, you find the right angles, and you shoot in optimal light. Then, you hand off the technical, time-consuming post-production work to a specialized tool. This approach allows you to multiply your output without sacrificing quality, freeing up your schedule to focus on client-facing activities that directly drive revenue.
Actionable Next Steps to Elevate Your Listings
To put these concepts into practice, here is a clear path forward:
- Master the Fundamentals: Revisit the core tips in this article. Focus on improving one area at a time. This week, make it a point to schedule a shoot during the golden hour. Next week, concentrate on achieving perfectly straight vertical lines in all your interior shots.
- Embrace a Hybrid Workflow: Don't view manual editing and AI tools as an either/or choice. Use your skills to capture great base images and then use AI-powered platforms to handle the heavy lifting of enhancement, sky replacement, virtual staging, and item removal. This synergy is key to professional results at scale.
- Explore Advanced Visual Content: As you become more comfortable, consider how you can integrate these visuals into more dynamic formats. To leverage cutting-edge tools in your visual content strategy, you might find valuable insights into how generative AI is shaping content creation and interactive media.
By integrating these advanced realtor photography tips with smart technology, you’re not just taking better pictures. You are building a powerful, efficient, and modern marketing engine that sets your listings apart and positions you as a forward-thinking expert in your market. Your commitment to exceptional visual presentation will not only attract more buyers but also win you more clients who see the clear value you provide.
Ready to transform your property photos from good to unforgettable in seconds? Discover how Pedra uses advanced AI to automate virtual staging, sky replacement, image enhancement, and more, giving you a competitive edge. Try Pedra today and see how effortless professional real estate marketing can be.

Related Posts
7 Ways AI for Real Estate Is Transforming the Industry in 2026
Explore how AI for real estate is reshaping the market in 2026: valuation, predictive analytics, vir...
Digital Real Estate Agency: A 2026 Guide to Transforming Your Brokerage
Run a digital real estate agency that closes faster: tools, automation, visual presentation and a st...
8 Facebook Marketing Ideas for Real Estate in 2026
Explore our top 8 Facebook marketing ideas for real estate in 2026. This guide covers paid ads, orga...
Real Estate Floor Plans 2026 - Win More Listings
Master real estate floor plans to win listings and engage buyers. Learn to create and use 2D and 3D ...
10 Home Exterior Renovation Ideas to Boost Curb Appeal in 2026
Discover 10 home exterior renovation ideas to boost curb appeal in 2026, from siding and stone accen...
Home Staging Tips: 8 Ways to Sell a Home Faster in 2026
Looking to sell a property faster and for top dollar? These eight essential home staging tips will s...