
Step-by-Step Guide to Virtually Furnish Rooms with Virtual Furnishing Tool
Learn to virtually furnish rooms and properties. This tutorial will help you virtually furnish like a pro.
What is Pedra's "Furnish" tool for?
With Pedra's furnishing tools, you can add furniture to the rooms of your property.
Showing furnished rooms can help speed up the sale, as buyers will better understand the layout of the spaces when they see the photos on major real estate portals.
Additionally, the furniture added by Pedra looks clean, new, and tidy, which leads to positive emotions when viewing the photos.
How do I virtually furnish a room with Pedra?
Once you have uploaded the images you want to furnish, select one of them.
Click on "Edit with AI", and you will see the option to "Furnish".
Below, we show you the steps to follow to furnish a space with Pedra.
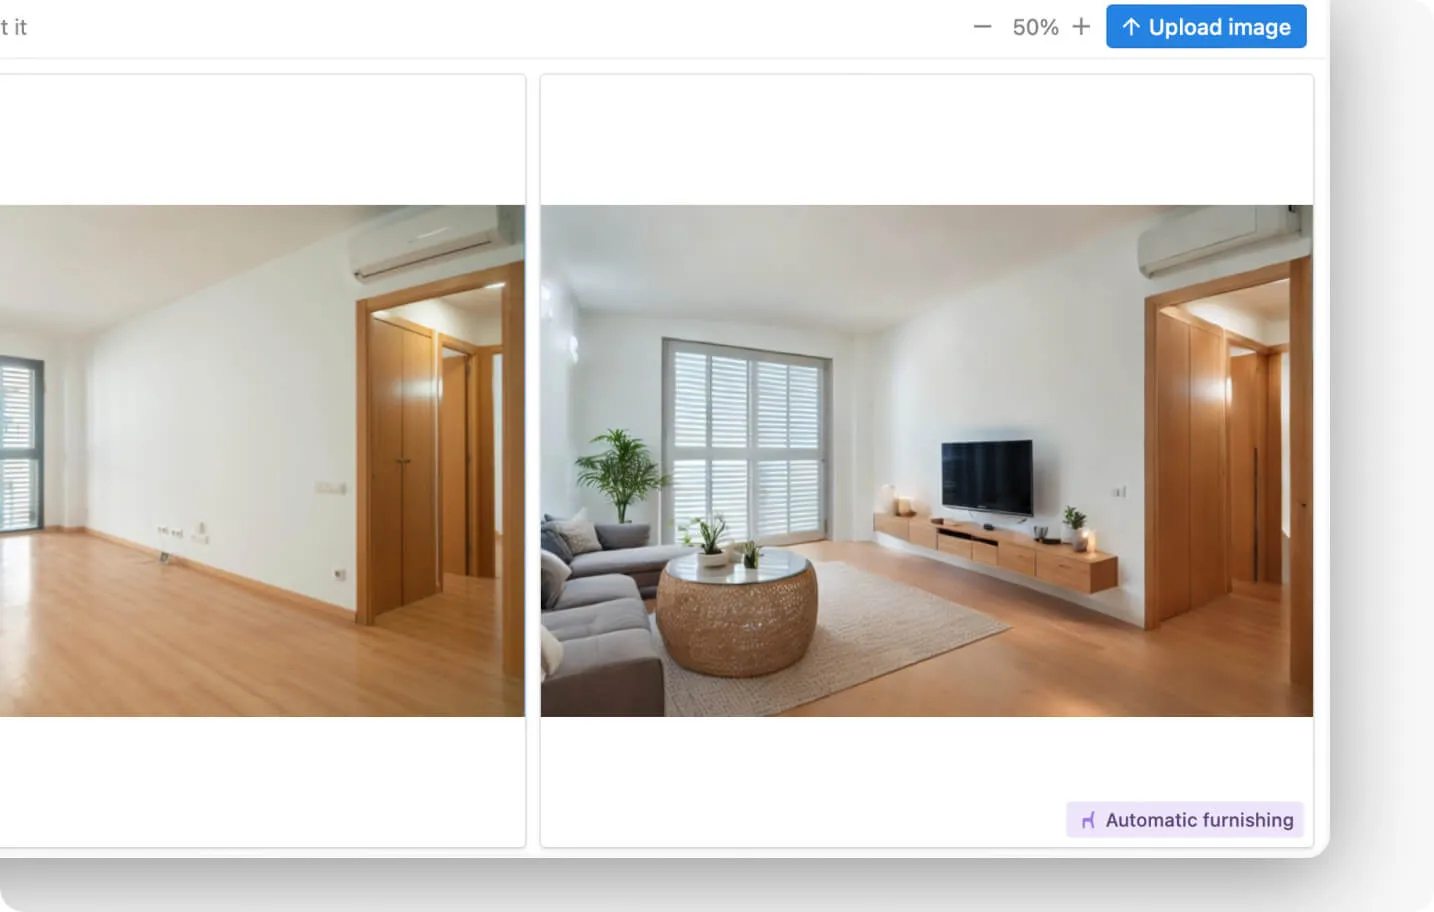
Step 1 – Type of room to be furnished
In this first step, you need to select the type of room. If you select 'Bedroom', it will place a bed, a nightstand, a lamp, etc. If you select 'Living Room', it will place sofas, coffee tables, a TV, etc.
Step 2 – Virtual furnishing style
Choose the furnishing style: 'Minimalist', 'Scandinavian', 'Modern', 'Luxury', 'Mediterranean', 'Traditional' and more. Hover over each style to see a preview of the same room furnished in that style before you generate.
If you prefer a specific look, choose "Use furniture from another image" and upload a photo with the furniture you like. Pedra will furnish your room with those pieces.
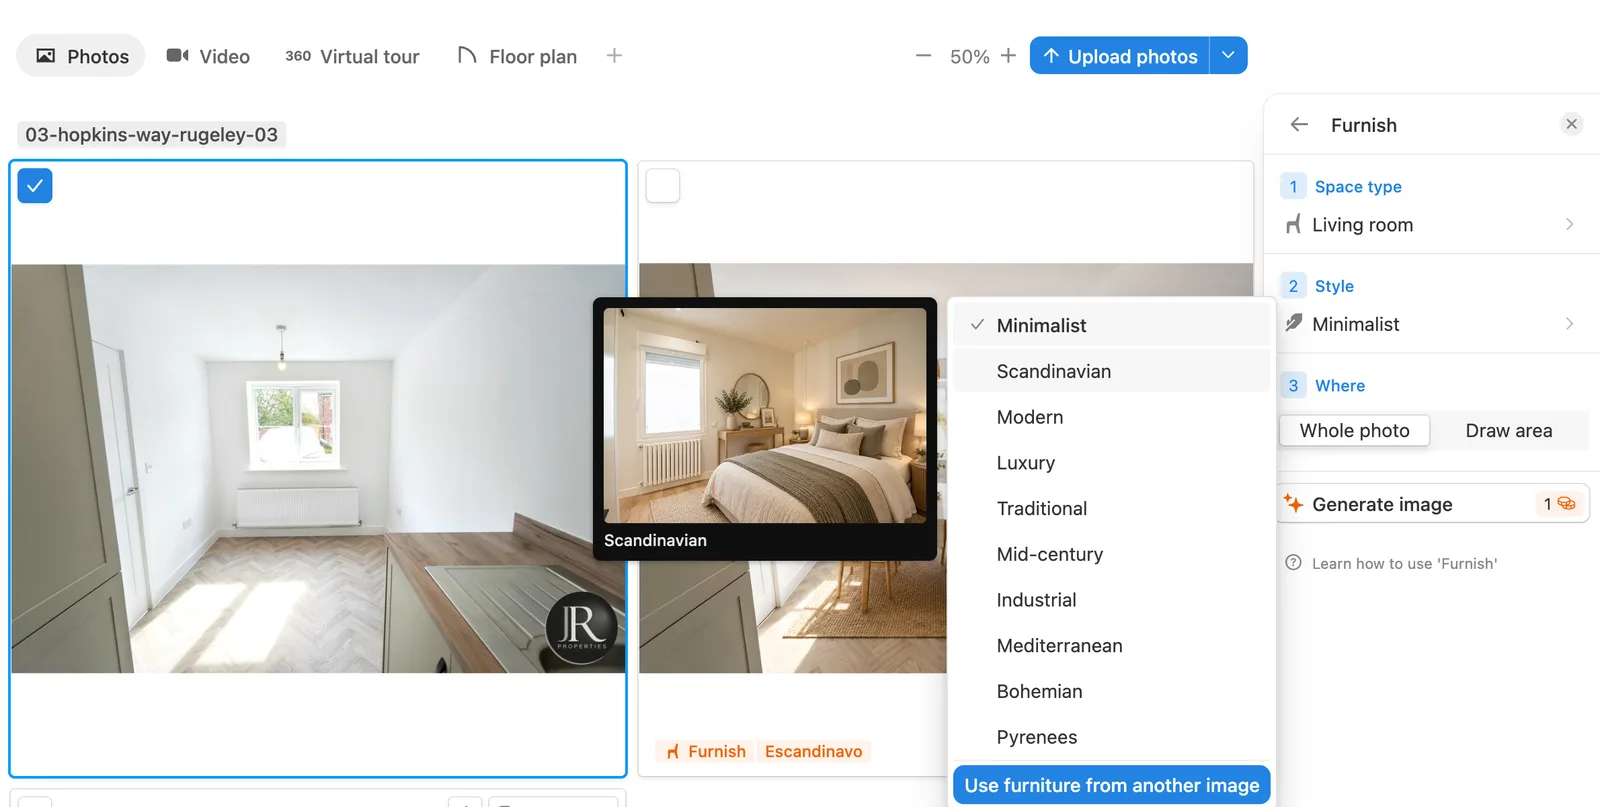
Step 3 – Selection of the area to be virtually furnished
The last step determines where the furniture will appear. Choose "Whole photo" and Pedra will decide where to place the furniture in the room.
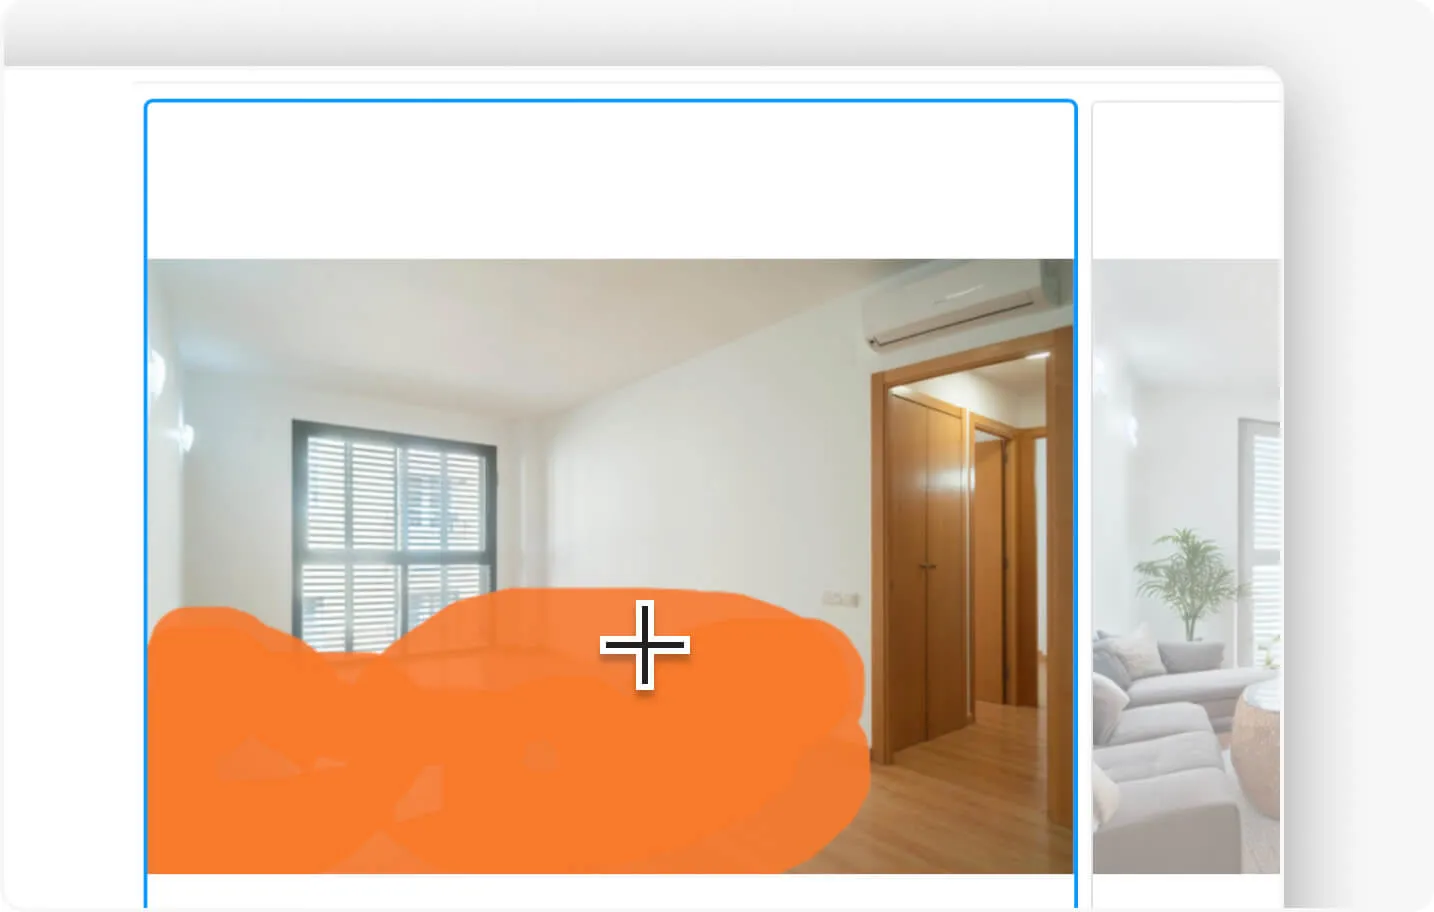
If you need more precision when placing the furniture, select "Draw area" and paint the area where the furniture should appear. Just paint a uniform and large area. Pedra will only place furniture inside the area you paint and leave the rest of the room as it is.
Finally, click "Generate image". Each furnished image costs 1 credit (2 credits with "Use furniture from another image").
How to get the best virtual furnishings
Follow these tips to get the best results:
- Choose the right room type in step 1: it decides which furniture Pedra adds.
- To control the placement of the furniture, choose "Draw area" in step 3. This way, you can indicate where the furniture appears and what space it occupies.
- If you choose "Draw area", do not paint a very small area to avoid furniture with too small dimensions. Paint a uniform and large area, and paint over the floor, not over windows or doorways.
- If you want to control which furniture to add, its orientation, and its size, we recommend the Add object. This other Pedra functionality allows you to choose the furniture to place, its orientation, and size. You can see how it works here.