How to Add Info Points to a 360 Virtual Tour
Add info points to a 360 virtual tour in Pedra: an icon on the wifi, the heating or the washing machine that opens a card with text, a photo or a video. Free.
TL;DR: Open your tour → Edit tour → switch to Info points → click the object in the photo → choose an icon, write a title and text, add an image, video or link → Save. Visitors tap the icon and read the card. Free, and live on the tour link straight away.
What info points are for
Links move visitors from room to room. Info points explain what's in a room: the wifi password on the router, how the heating works, which program to use on the washing machine. A visitor taps the icon and a card opens with your text, a photo or a short video.
- Holiday rentals: the tour becomes the guest manual. Wifi, keys and check-in, heating and air conditioning, appliances, rubbish, parking.
- Real estate: point out what photos don't say. Underfloor heating, the year the kitchen was renovated, the storage room, a video of the view from the terrace.
How to add an info point, step by step
1) Open the tour editor
Open the property in Pedra, go to Virtual tour and click Edit tour. No tour yet? Create your 360 virtual tour first.
2) Switch to Info points
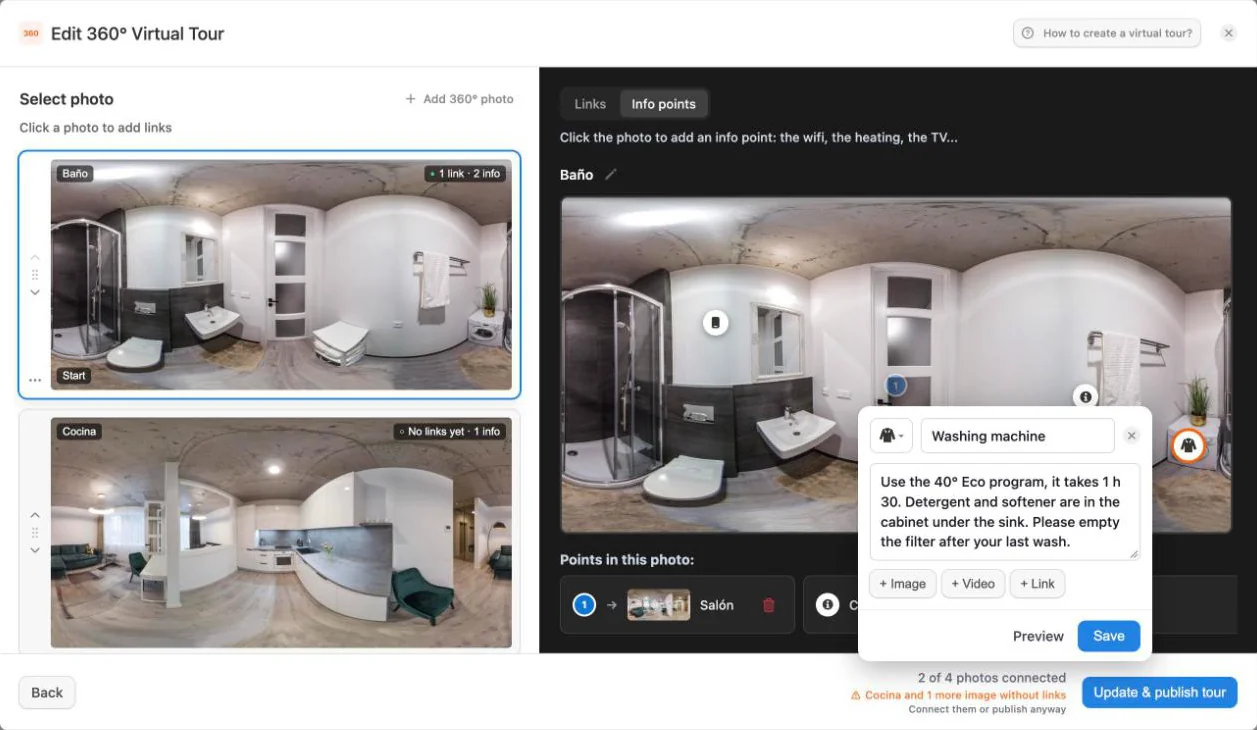
At the top of the photo, switch from Links to Info points. The hint reads: Click the photo to add an info point: the wifi, the heating, the TV...
3) Click the object in the photo
Click right on the thing you want to explain. The point is placed there and the form opens next to it.
4) Fill in the card
- Icon: choose from 38 icons, from wifi, keys and heating to laundry, parking and pets.
- Title (optional) and text: keep it short, the way you'd explain it to a guest at the door.
- + Image: upload a photo, for example of the router label.
- + Video: paste a YouTube or Vimeo link, for example a 30-second clip on how to use the oven.
- + Link: a web address that starts with https://, for example your house rules or a restaurant guide.
5) Preview and save
Click Preview to see the card as visitors will, then Save. The point is saved straight away and shows on the tour link without publishing again.
What visitors see
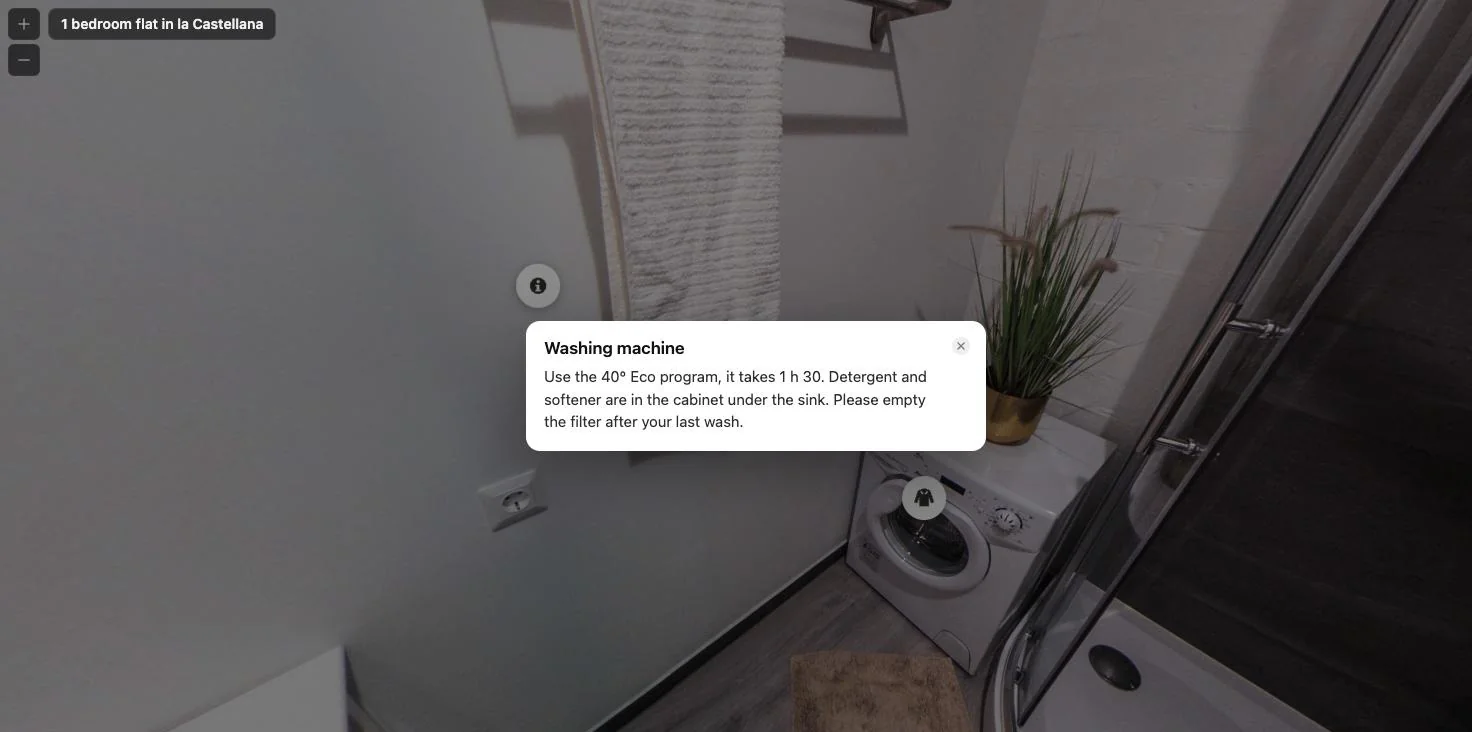
On a computer, the card opens over the room:
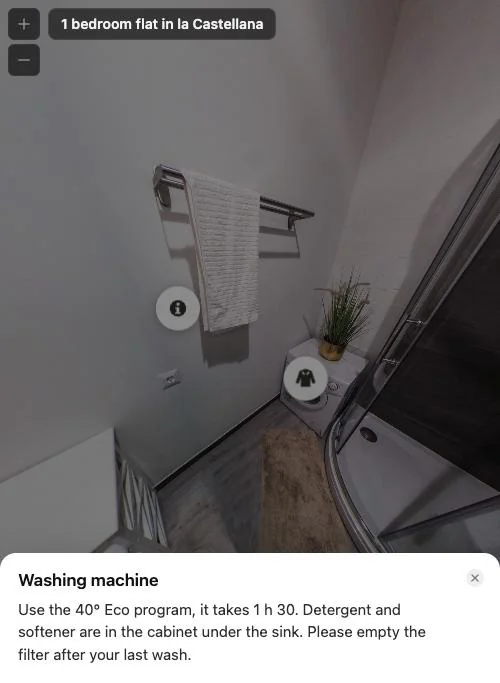
On a phone, it opens as a sheet from the bottom of the screen, so the room stays visible above it:
Good to know
- Free: info points don't use credits.
- Everywhere the tour is: the public link, the embed on your website and the viewer inside Pedra.
- Move or delete: in Info points mode, drag the icon to move it, or open it and click Delete.
- One point, one object: a point on the router for the wifi, one on the radiator for the heating. Visitors find them where they'd look.
FAQs
Do info points cost credits?
No. Adding, editing, moving and deleting info points is free on every tour.
What can an info point show?
A title, a text, an image you upload and a YouTube or Vimeo video, plus a link. You need at least one of title, text, image or video.
Do I have to publish the tour again after adding a point?
No. Points save as you click Save and show on the tour link straight away.
Do info points work on phones?
Yes. On a phone the card opens as a sheet from the bottom of the screen, on a computer as a card over the room.
Can I move or delete a point?
Yes. In Info points mode, drag the icon on the photo to move it, or open it and click Delete.